The Purple Cruiser
Tagged: bike diy projectThis is a continuation of Adventures in Frame Painting.
So, I have a painted bike frame sitting in the closet. Now summer is full swing, and the weather is perfect to show off the new paint job. Plus, I have enough accumulated garbage bikes so surely I have enough spare parts for a build.
I’m building this bike for a friend of mine who had never ridden before. She didn’t have a bike growing up, and so this would be her first. So I decided to keep it simple. It didn’t have to be fast or fancy. All I knew was that it should have reliable brakes, simple gearing, clean shifting, thick tires, and a comfy riding position. Luckily she’s rather tall, so this large frame would actually fit her.
The build I envisioned had a 1x drivetrain, six speeds (a rear wheel with a x6 freewheel is just what I had lying around) a friction shifter, cruiser handlebars, mountain bike tires, linear pull V-brakes, and a wide seat. As with every build, it started with a lot of sorting through parts bins, cleaning, and arranging stuff. I won’t go super in depth with the general cleaning and assembly stuff – it’s business as usual at this point – but I’ll write about the notable roadblocks I encountered.
Mocking up the bike
I usually start by installing the headset and stem and putting on the seatpost, handlebars, cranks + pedals, and brake + shift levers. Then I sit on the bike and make sure it’s reasonably comfortable and will work out geometrically.

Then, I take the relevant pieces off, and go through the process of cleaning everything. Sometimes this is a non-event, other times I have to do things like disassemble, clean, and re-lube rear derailleurs and shifters. I had some shoddy brake levers I was planning on using, but they turned out to be a little too shoddy. They didn’t have barrel adjusters, needed to be bent back into shape, and didn’t have enough pull distance to use with V-brakes. In the end, I ended up using mismatched brake levers, both of them the left lever in a higher quality set. I got them from a fixed gear bike my mom found at a junk exchange. (Once I finish overhauling the brakes on it, I’ll probably do a writeup about it as well.)

I do most of my parts cleaning outside, in a wash basin with dish soap. I also keep a yogurt container full of a degreasing agent/solvent that I can apply to problem spots.

I just throw the chain in my degreaser bath for about 20-30 minutes, and then wiggle it around under the hose and wipe it down with shop towels. Remember to re-lube it when you install it!

After washing and scraping all the rust and grit off all the parts, I usually leave them to dry sitting on shop towels, with a window open for airflow. I want them completely dry before reassembly, so I usually leave them at least overnight.

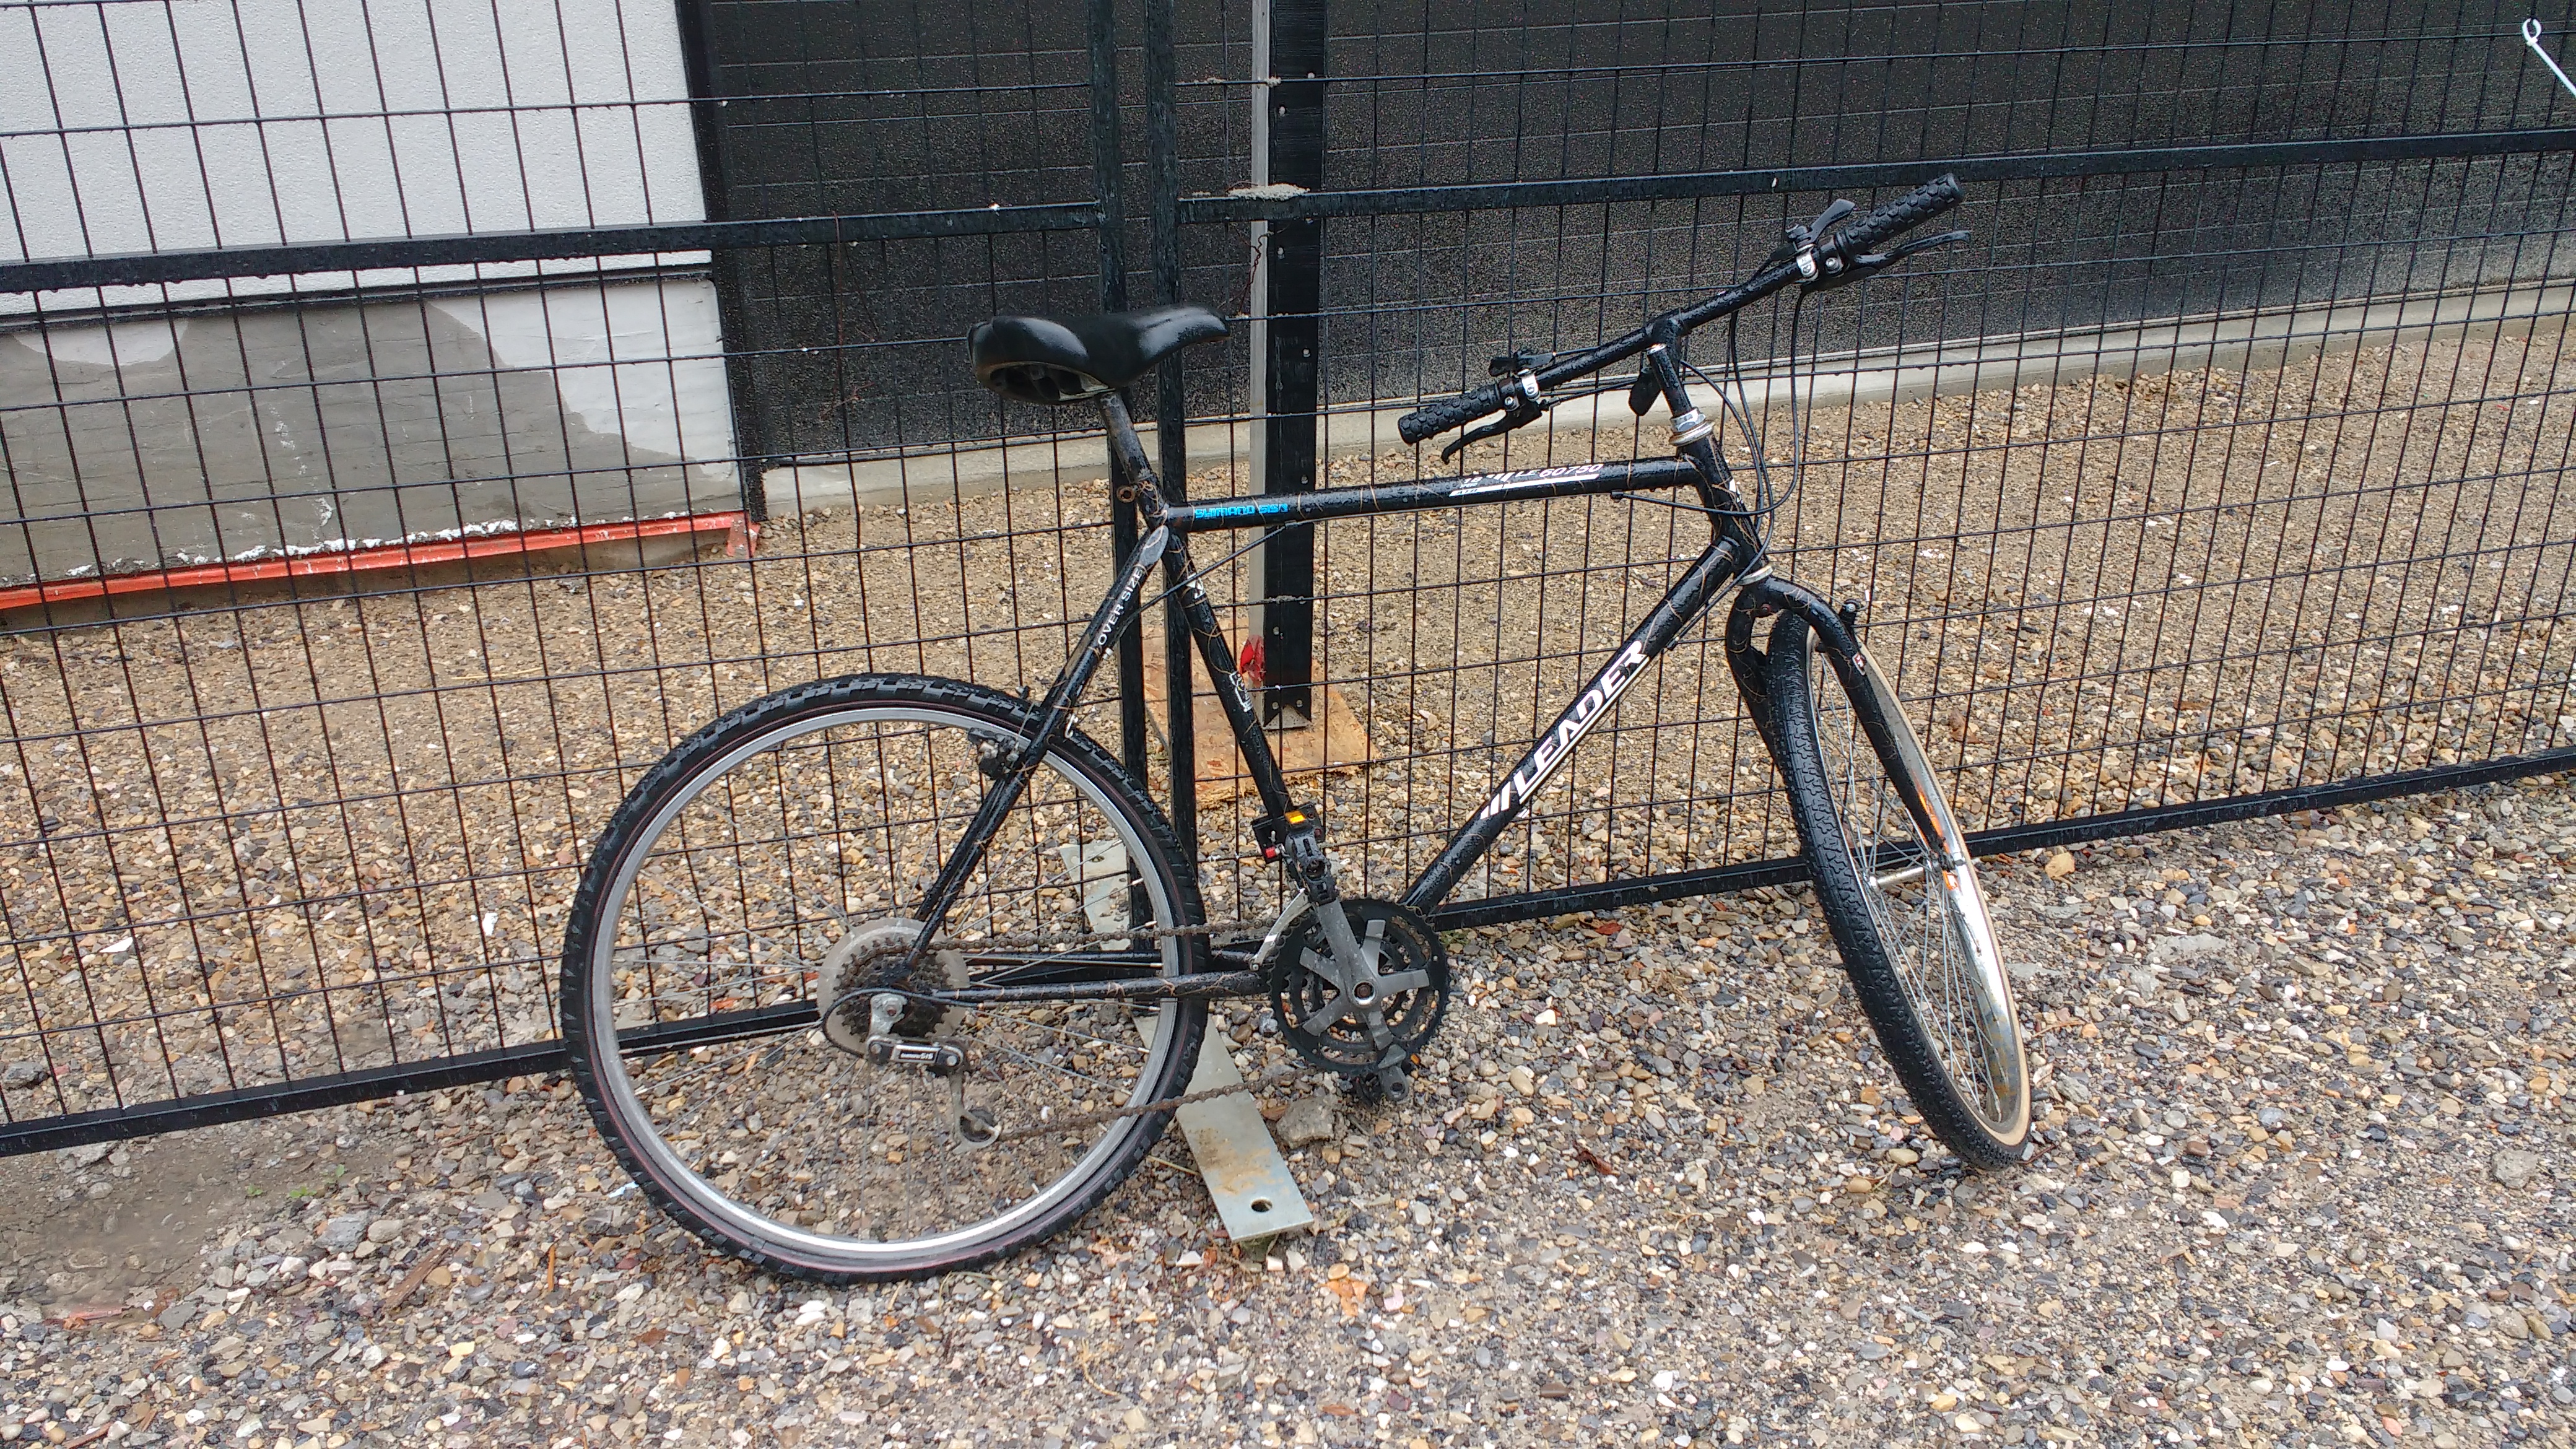
After the parts had been dried and reassembled, I was eager to try out the bike, so I installed the drivetrain and front brake and took it out for a spin around the block. This was something new for me, to get the bike to a “technically rideable” stage and just tear around a bit. I hadn’t adjusted the derailleur, but it was a friction shifter so I was able to use a smaller range of gears and get a feel for things.

Note three things about the above image.
- The rear v-brakes haven’t been installed.
- The brake levers are mismatched. Both are the left shift lever from a different set of brakes, and the lever on the left side has been jury rigged with a bolt that’s too long. But they work well!
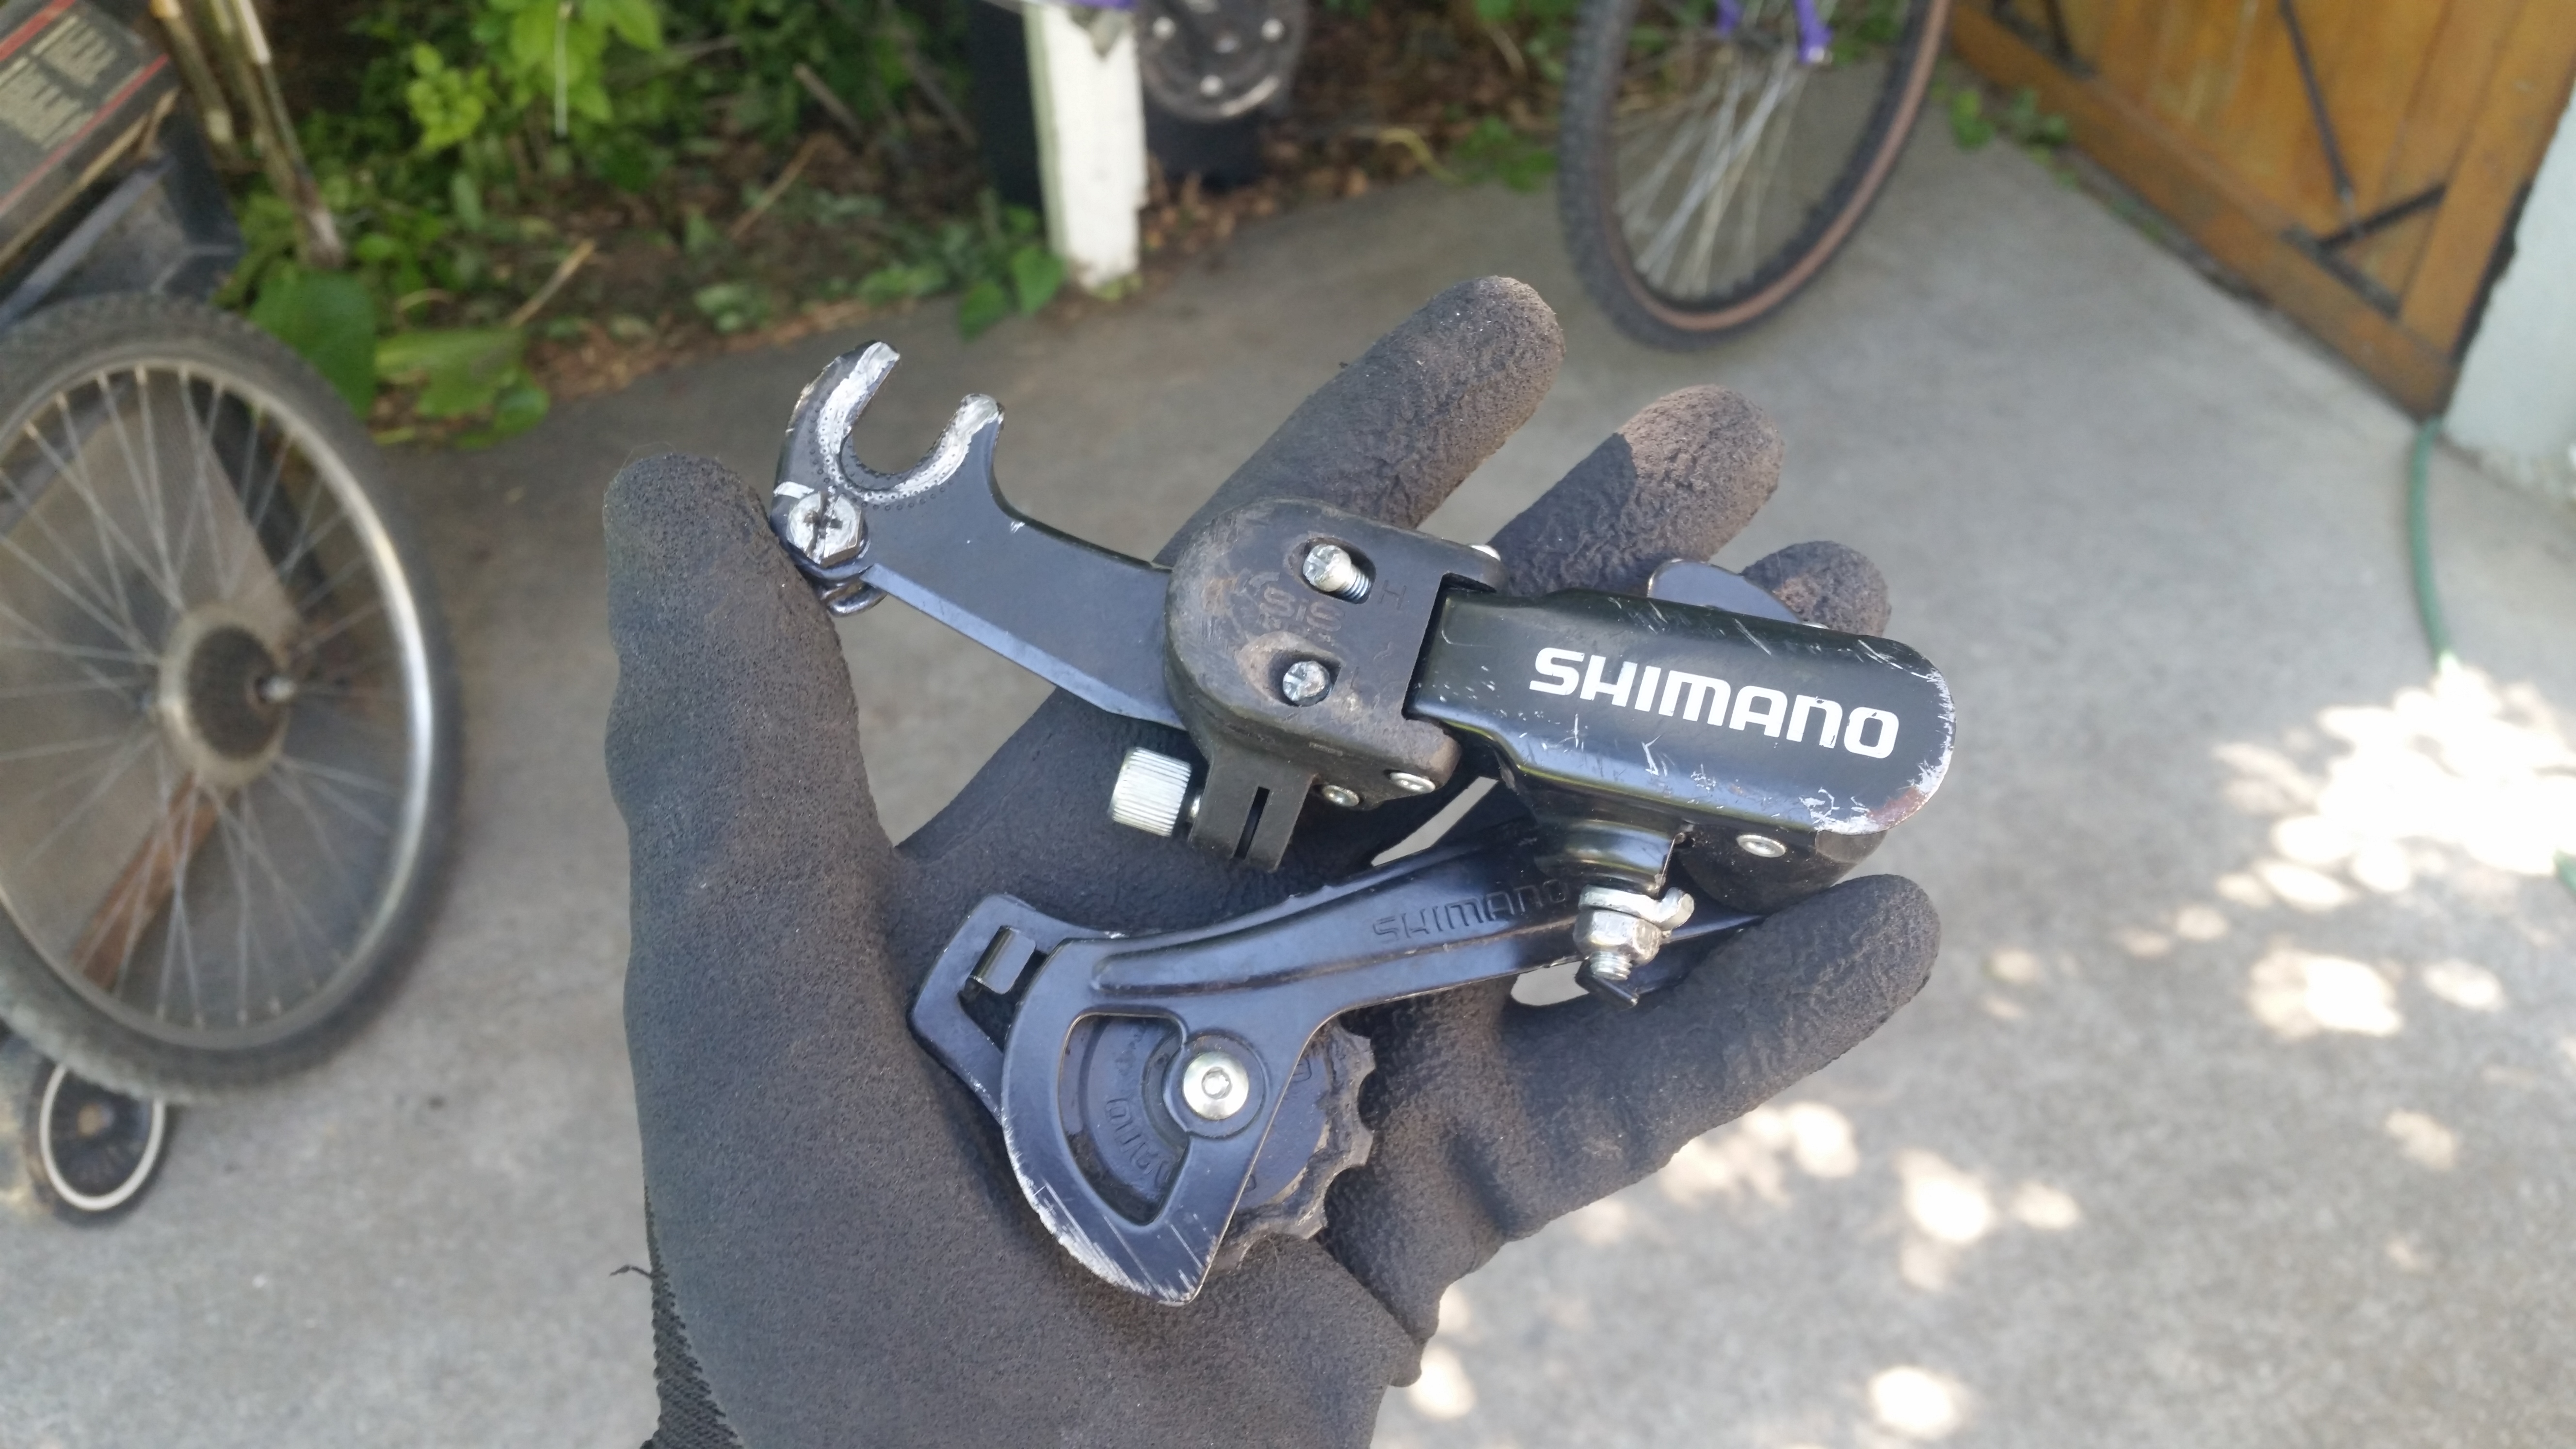
- The derailleur I installed was an unmarked Shimano derailleur.
Usually Shimano drivetrain parts have a groupset name (Such as Tourney, Alivio, Acera, Atlus, Deore, etc.) If they’re missing a groupset name, that generally means they’re department store trash. The kind of thing you find on $100 Canadian Tire bikes. I figured it’d be good enough for a 1x drivetrain with a friction shifter, though.
I ended up being wrong. A note to my future self: Any bike you build should have Shimano Tourney or better. Department store bike parts are NOT ACCEPTABLE.
The Brake Braze-on Botheration
Now, there was a good reason the rear v-brakes hadn’t been installed yet. And that’s because the pivot posts on the frame were, shall we say, abnormally far apart. The pads of the v-brakes weren’t making meaningful contact with the rims of the tire. I ended up measuring the distance with a ruler.

The front seemed pretty standard - I measured other bikes I had with cantilever pivot posts and they all seemed to match the spacing on the front fork.

This seemed strange to me. I had to go back and look at a photo of the bike as I found it to see how it was initially set up.
You should always snap a photo of the trash as you find it before dragging it home, or at least before you do anything to it. You never know when it might come in handy for reference.
My memory was hazy, but I seemed to recall that the rear cantilever brakes had something wrong with them (a broken spring or some such) and I had thrown them out. I kicked myself for that, as now I couldn’t investigate if there was anything special about those cantilevers. The original bike also didn’t have a braze-on or seatpost mount for installing a cable stop for the rear cantis. It was missing the seatpost bolt, so I figured that it was also missing the cable stop hardware.
Also, did the words “Over Size” painted on the frame mean that the rear wheel was oversized in a way that required wider cantilever pivots? I still have no idea. The original rear wheel went onto another bike that I fixed up for a friend, so it’s long gone. Maybe it had wider rims than normal, I’m not sure.
Regardless, I needed to find some other way to rig up rear brakes. Remember, the person who would ultimately be using this bike would be just learning to ride on it, so I wanted something with good and reliable stopping power. I was stuck for about a week trying to find out what to do here.

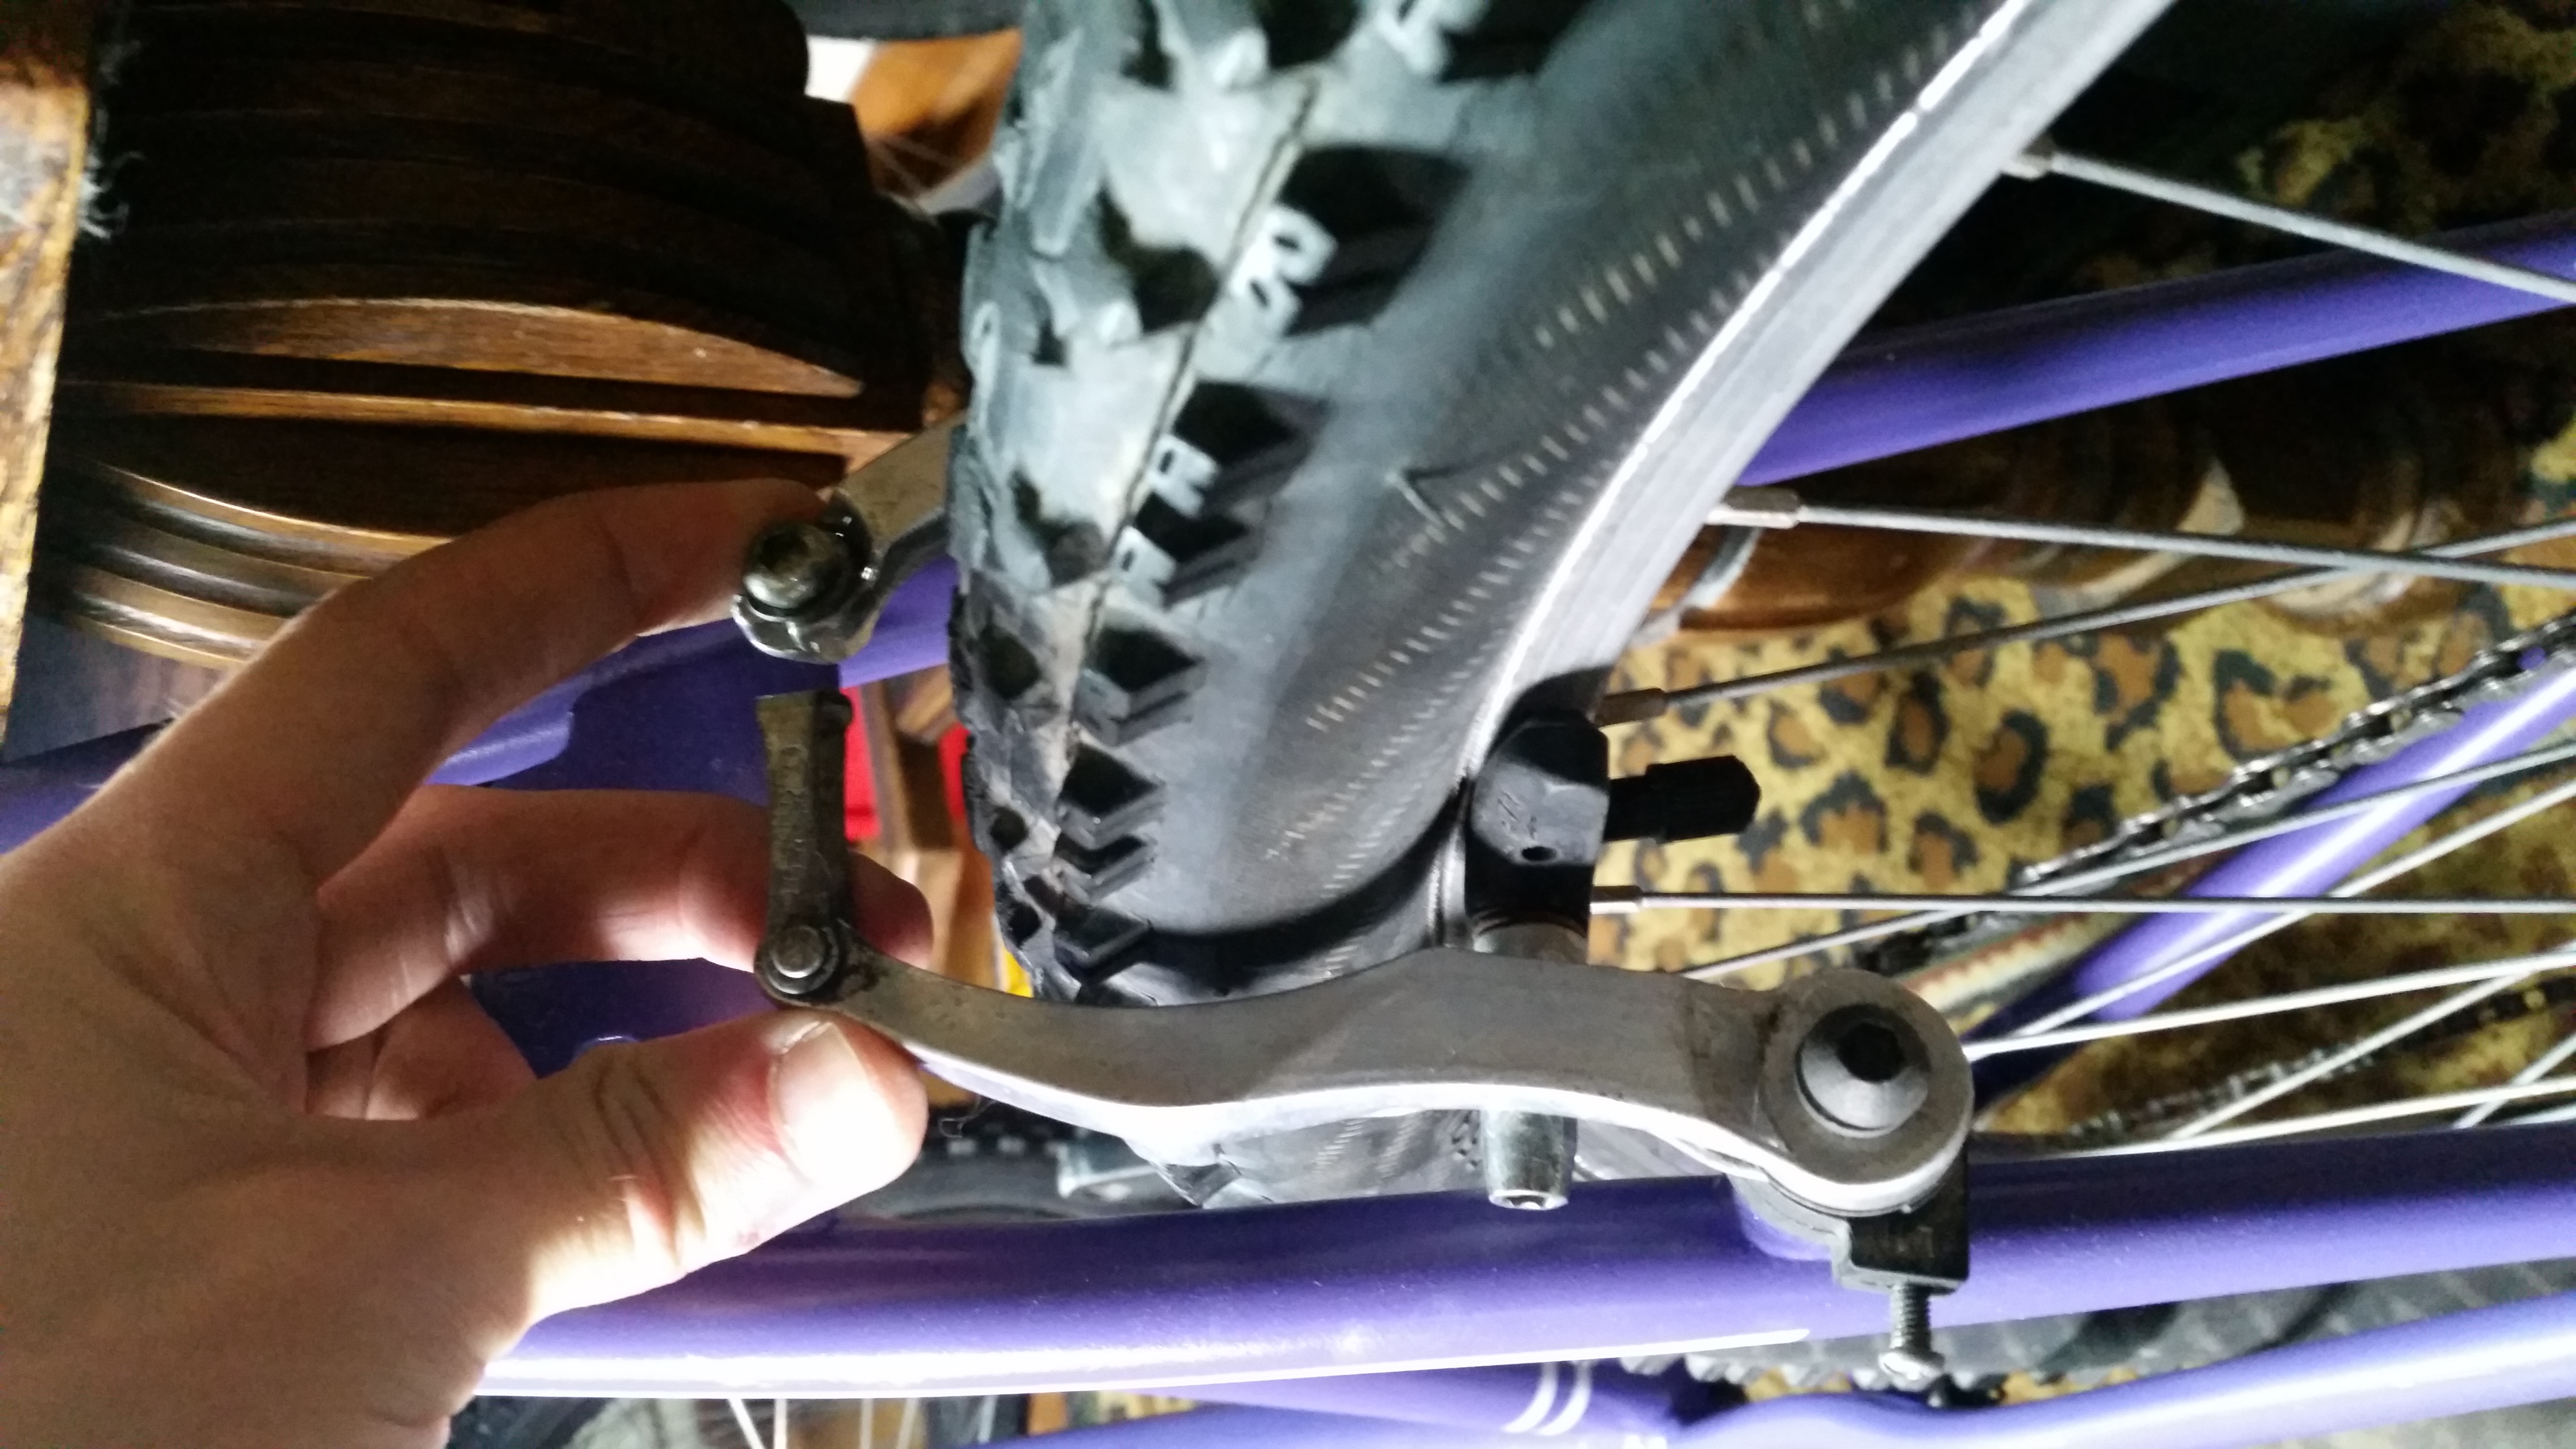
In the end, I jury rigged it. My solution involved these shitty v-brakes I plundered from a dumpstered kids bike, since the place where you mount the pads is unusually narrow on them. I added a bunch of spacers to the front of the brake pads, and this seemed to bring the pads in just enough. The spacers I got were yoinked from other brakes (center pull road brakes, most of them too rusty and crusty to use anyways), and this seemed to work just fine.


Finally, a full set of linear pull v-brakes with proper levers, clearance, and spacing. I grabbed the brake pads I had with the least amount of wear, and installed them. Success!
Drivetrain and Wheel Woes
(A side note: I finally got a stand! Or something approximating one. My dad had some hardware from a roof-mounted bike carrier, including this hinged frame clamp. He gave me the clamp and I bolted it to this old fencepost in my back yard, and now I can work on bikes without hanging them from a tree or balancing them against something. Thanks yet again Dad for saving me here.)
With all my issues sorted, I finished assembling and tuning the bike up. I set the derailleur limits, checked all my cable tension, toed the brakes, and lubed the drivetrain.

I always end up taking my bikes to this schoolyard near my house and taking pictures. It’s got a lot of fun terrain to ride through, lots of little mounds, patches of gravel, paved areas, and grass. Plus a soccer goalpost that’s ideal for leaning bikes up and taking pictures.

The next day, I took the finished bike for a longer ride. Once I got underway I started to notice that the drivetrain was loud and rattly and squeaky in all gears except the highest. This was, of course, because of the shitty derailleur. It didn’t slow me down much, but it did make it rather unpleasant to ride. Shifting gears was anything but smooth, and I even managed to unseat the chain from the front chainring when I hit a bump. I assume that means the chain tensioning with this derailleur leaves a lot to be desired
Later on I would decide to replace the derailleur with another, better one.
I got about 5km before something actually went wrong. The wheelset I had was pretty old and tired. It was also mismatched. The front wheel was working fine, but the rear wheel had some issues with the the treading on its axle. It didn’t tighten properly, and the locknuts wouldn’t stay in place. Some parts of the axle were stripped as well. This meant that getting the wheel on the bike was a balancing act - sometimes the nuts holding the wheels to the frame would lose their threading and slip, and if you tightened them too much, the locknuts would push too hard on the bearings and the wheel wouldn’t spin very well. But I did get it threaded on right eventually, with a lot of patience while juggling 3 wrenches.
Or so I thought. As I said, about 5km into my test ride, the wheel started screaming. Just making terrible (and embarrassing) squeaking noises. It felt like the bearings were being compressed too hard, or that they were completely ungreased (this wasn’t true, of course.) I dismounted and inspected, and yes, the wheel wasn’t spinning freely any more. There was no brake rub, but it certainly felt like the brakes were being lightly applied when I tried to spin it.
I put another 7 or so km into it, pedaling against an annoying amount of resistance, stopping every so often to try in vain to fiddle with the wheel or make it stop squealing, but to no avail. When I got home, I took the wheel off and put it in my garbage pile. (I didn’t trash it immediately, I still thought I could plunder it for spare spokes and a spare freewheel.) Still, I’d need a new rear wheel. It would probably be a while before another one showed up.
Just kidding. About a week earlier, my dad had texted me this image, asking if I wanted him to pick these bikes up. If you’re wondering where I got my trash picking habits from, it’s probably pretty obvious by now. My family’s been at this much longer than I have.

Obviously I told him yes, and loaded them into my car the next time I was over. They were compatible 26" rear wheels, the both of them, but one was missing a few spokes. It looked like the chain had slipped at some point and mangled the spokes on the drive side. I decided I’d try to fix it up with spare spokes from the old wheel.

The mending went well enough, and I trued the wheel up as best I could. I’m still not amazing at truing wheels. Maybe if I had a proper stand I’d like it more. Or maybe I just lack the patience. Regardless, all the spokes are under some tension and it doesn’t wobble much when it spins, so I call that a win.

This would be a huge upgrade - now rather than a 6-speed freewheel, the bike has a 7-speed cassette with Hyperglide tech. (That’s the one with the shaped sprockets that allow the chain to engage more than one chainring at a time when shifting.) Shifting would be much smoother now.
The new derailleur I used was a Shimano Tourney. The most low-end named groupset that Shimano offers, to my knowledge. But it’s still a named groupset, so it’s leagues better than that one I was using. I ended up throwing away that old derailleur. Turns out even if you build bikes out of garbage, you should have standards.

This derailleur actually comes from the bike I used for my Winter Bike Build . I threw all the other drivetrain components in a freezer bag to send along with the bike itself when I gave it away. If my friend wants to tinker, she could potentially convert her bike to flat bars, install the grip shifters, and install the front derailleur. If not, that’s no problem either.

Sidenote: The Old Wheel
Remember how I said I saved the old wheel in hopes of plundering all the spokes and the freewheel? That didn’t go so well. I bought a compatible freewheel remover tool (Park Tool FR-1.3) happy in the knowledge that I had at least 3 other freewheels lying around that also used this tool and I’d probably get my money’s worth from it. I stuck the tool in my parents vice, slid the freewheel over the splines, and turned from the rim of the wheel.
Or at least tried to turn – it didn’t budge. Then got my dad to help me. We checked and double checked that we were turning it the right way to unthread it, and then just went for it with all our strength.
The result was a broken tool. Turns out the wheel was old enough that the seized freewheel was stronger than the freewheel remover. I was awestruck. I’ve never had a Park Tool break on me, and taking apart old bikes puts these tools under a lot of stress.

That same day, I had brought a bunch of other seized parts to my parents, in hopes of taking advantage of their heavy duty vice and long-handled wrenches. Among other things, I brought an incredibly seized quill stem that I was ready to just hacksaw apart, and a set of pedals that I couldn’t seem to get out of their cranks. Our other endeavors were successful, but this wheel is the only thing that bested us. I gave up and threw it in the back alley, where it vanished in a couple days. There’s always someone who will scavenge scrap metal.
This all really makes one appreciate how far we’ve come in terms of bike tech. The freehub + cassette technology is much easier to work with, and in my experience never gets so seized up that it can break your tools. I’ve never had a threadless stem get stuck, though quill stems always seem to be rusted and problematic. And don’t even get me started on cottered cranks. I straight up refuse to touch them.
Making the Front Crank Pretty
It feels really bad to run a 1x drivetrain with a 3x front crankset. Two of the sprockets don’t even get used.
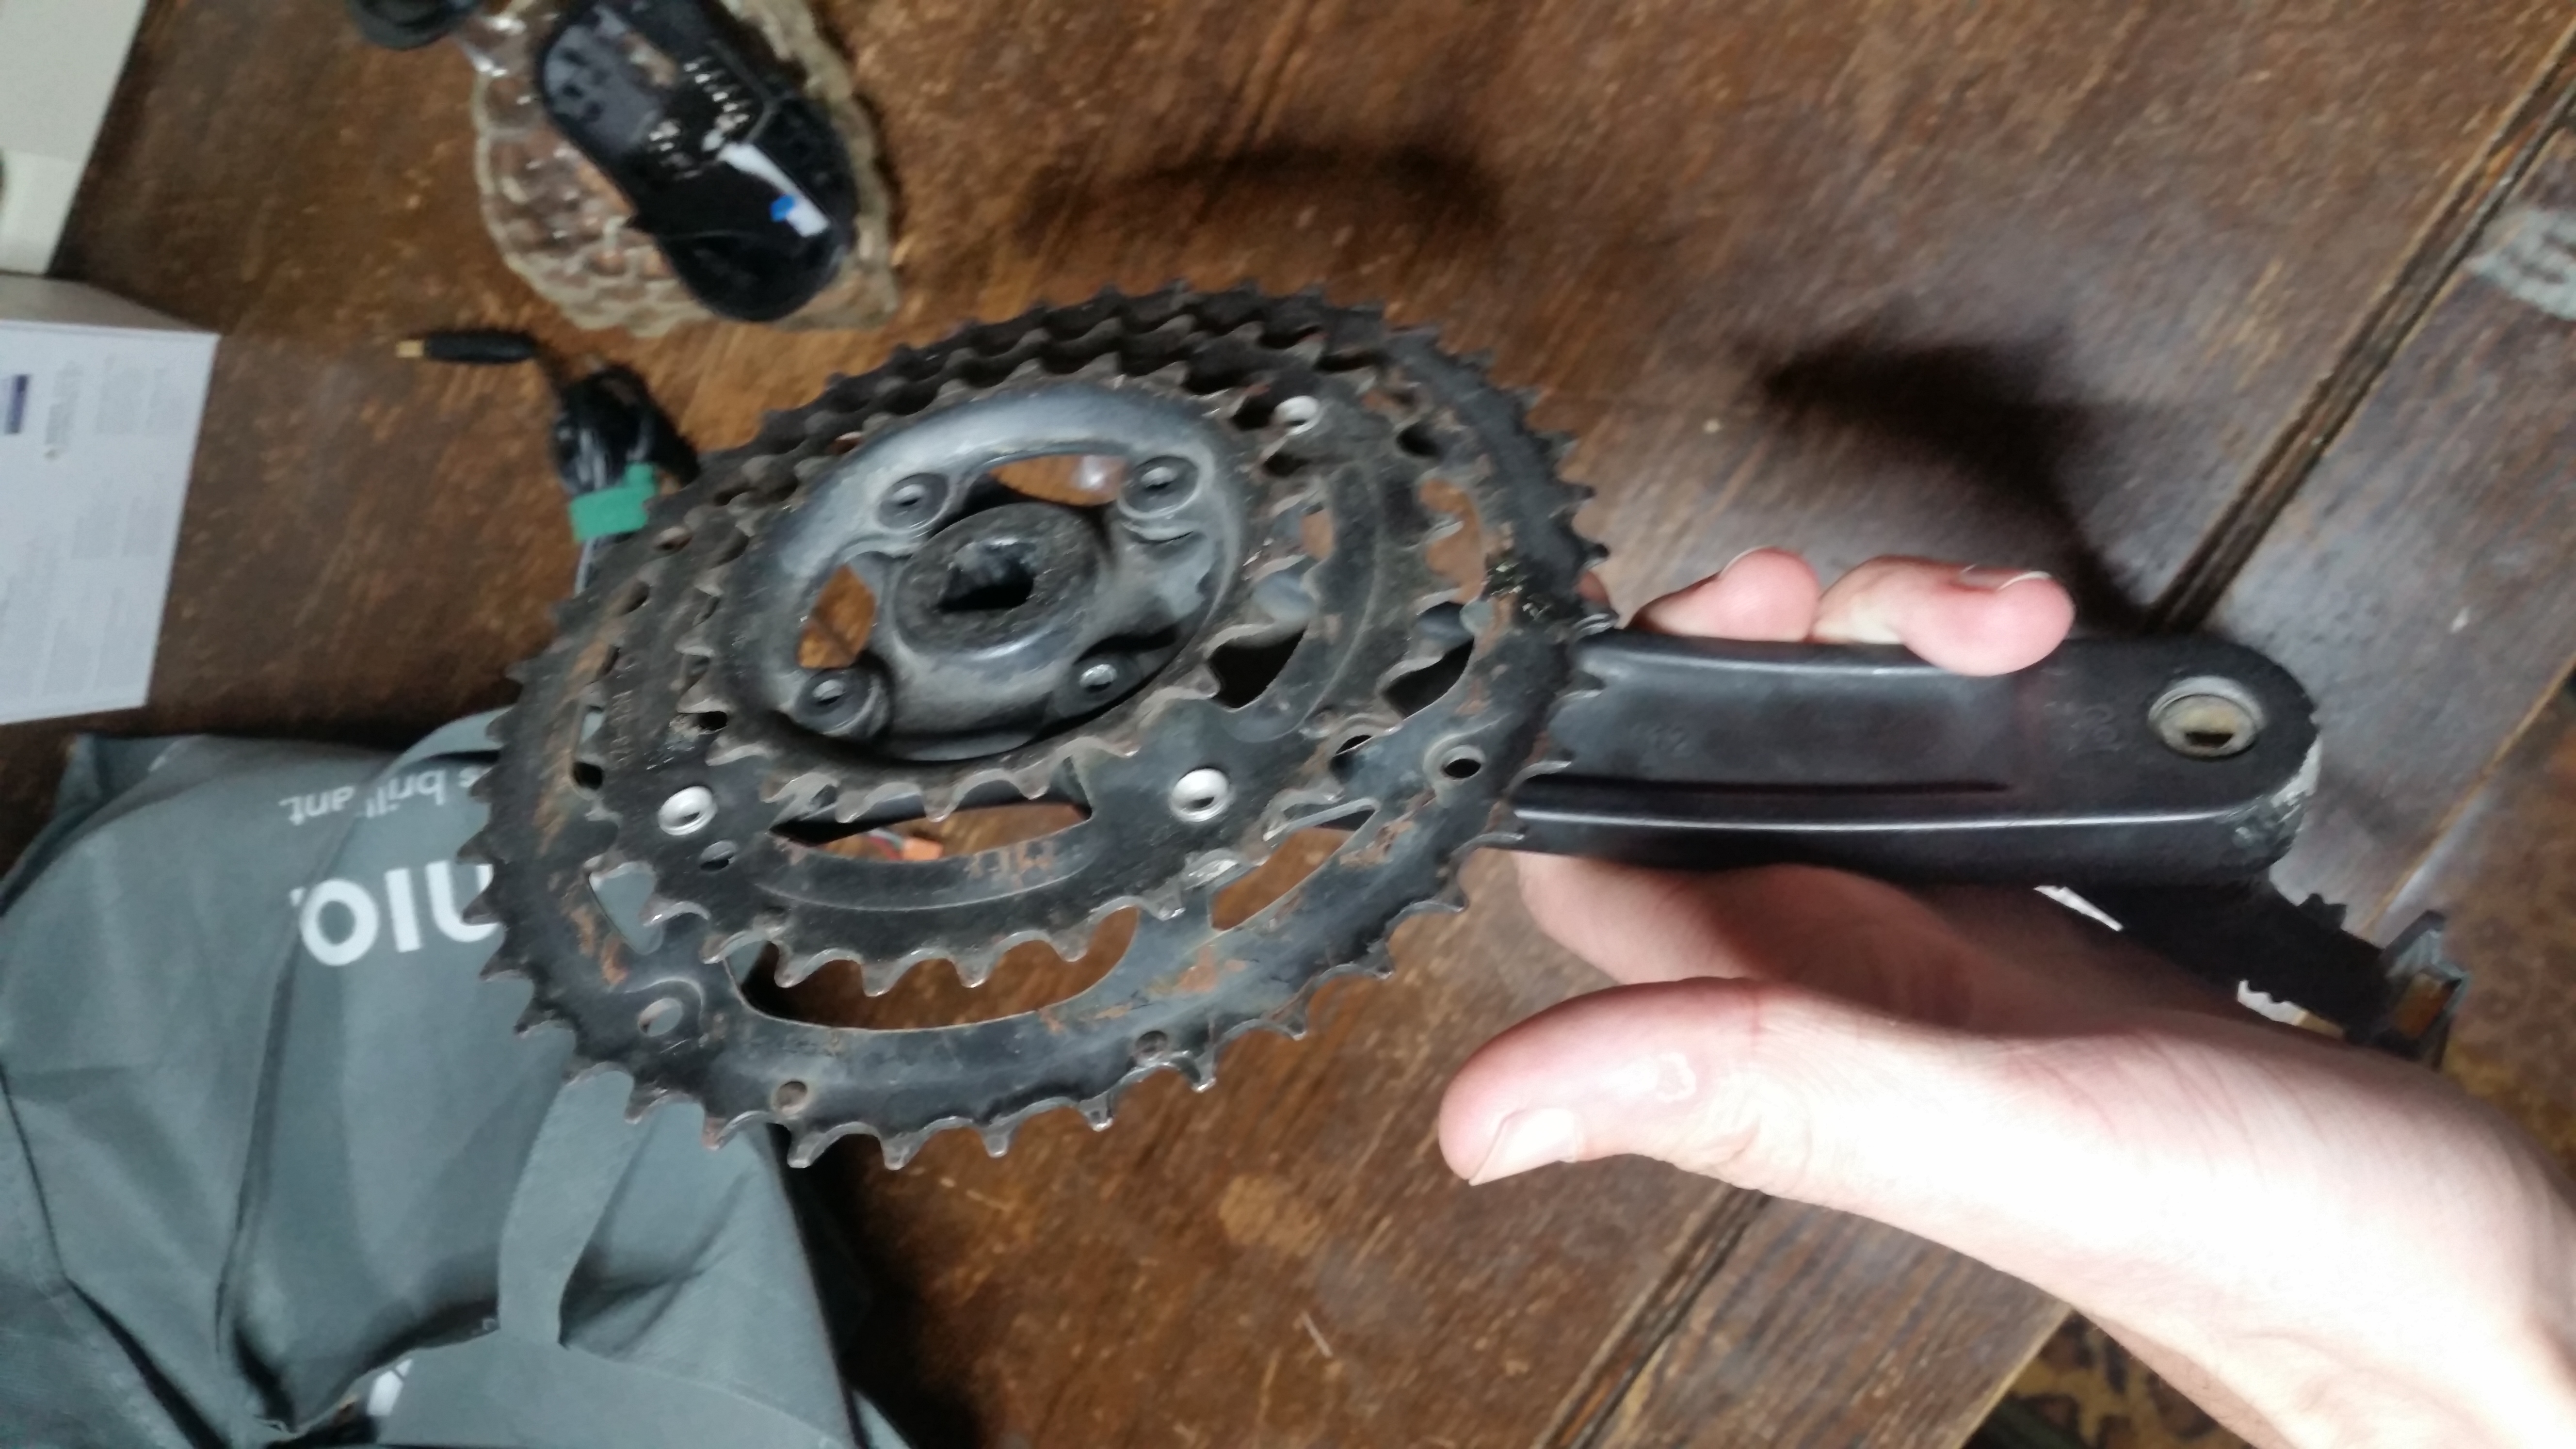
You’re just carrying extra weight around, and it doesn’t look pretty or cute. And this was supposed to be a purple cruiser bike ridden by a cute girl, so it should look at least a little pretty and cute, even if it’s made of garbage.
Plus, I noticed while riding that my chain line was anything but straight, especially in lower gears. Having the chain constantly on the outermost sprocket of a 3x crankset will do that.
I wanted to move it inwards. Unfortunately, the crankset wasn’t build for this, as the bolts threaded directly into the 2nd chainring. I took some hardware from another crankset for the bolts to thread into, but there was still too much play.

So I caved and I bought some washers. They were 24 cents each at Home Depot. They were the first parts I purchased expressly to build this bike, and I got them as a final touch.

I believe they were M10 washers, but I urge you to just take the crank bolts into the hardware store and measure yourself if you try to do something similar. It’s a bit of a hackjob.
And that’s it! I installed the final touches – a bell and a bottle cage – and loaded it up to deliver to its new owner. Later on we’re planning a little parking lot gathering with her brother to show her how to ride a bike. With any luck she’ll catch some of my crazy, and get a ton of use out of it.
I sincerely hope that in less than a year she comes back saying this bike isn’t good enough for her any more. Then I’ll be sure it’s done a good job as a first bike.

Cost Breakdown
This was a fun one - Ignoring the cost of the paintjob, I didn’t buy any new parts to get the build completed. Except, of course, the washers.
| Item | Cost |
|---|---|
| Washers for Front Chainring | $0.72 |
| Total | $0.72 |