Fixed Gear Retrospective
Tagged: bike opinion projectLast year, before I got super bike crazy, my mom found a strange bike at a community junk swap. It was a beautiful deep-red lugged steel Raleigh Olympus. She said she had picked it up to take home, and noticed that as she was walking it back, the cranks were slowly spinning and bumping into her leg.
She picked it up because it was beautiful, and because she was a fan of old Raleigh bicycles. But she hadn’t known at the time that someone had converted it to be fixed gear. It sat in their yard for a while while they wondered what to do with it. I tried riding it, and within ten seconds I decided it wasn’t for me. It was extremely uncomfortable and felt very unsafe to have the pedals in lockstep motion with the wheels.
A while later I did more reading and my curiosity got the better of me, so I asked to borrow it.
For those uninitiated, a fixed gear bike (or ‘fixie’ if you’re a hipster) is a bicycle with no coasting mechanism. The rear wheel is locked to the movement of the cranks by the chain. If the bike is moving forward, so are the pedals. You can’t lazily roll down a hill, for example; as you pick up speed, your pedals may move so fast that they threaten to send you flying over the handlebars. This means that you can control the speed of the bike by applying force to the cranks. You can even backpedal so hard that you lock up the rear wheel and go into a skid. Using this method to stop your bike is called as “skip stop” or “skid stop.” As with all things bicycle related, Sheldon Brown has an excellent article on fixed gear bikes.
As a disclaimer, this post is going to be a meandering mess. I’m not sorry about this, since my journey with this bike has also been a meandering mess that has spanned nearly two years. I got this bike before the Peugeot bike in my first article on this site, and it’s still not in a state where I’d call it completely finished. It’s been built and altered piecemeal over the course of many many months. I’ve also waffled a lot on whether I even wanted to keep it (and I’m not sure yet if I’ve fully committed.)
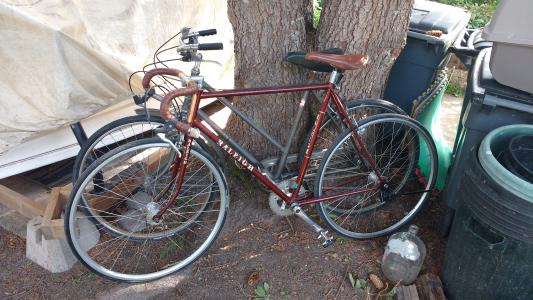
I half-rode, half-walked it home. It felt extremely unsafe, the brakes barely worked, and if I let my mind wander I would try to coast, and nearly be thrown out of the saddle. The riding position was also incredibly aggressive, and made me feel like a spandex wearing road cyclist. I figured I’d toy around with it and give it to my friend.
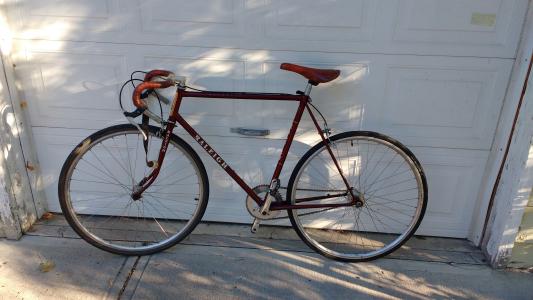
The bike turned out to be a fun novelty - I would take it out and slowly pedal around the neighbourhood, feeling unstable and unsafe, going to run small errands and check out little free libraries. I never rode it up or down any hills for fear that I’d lose control. At this point I was still deciding what to do with it, but I couldn’t deny that the sensation of riding it was addictive.
Having the pedals push upwards on my feet as they completed their rotation was a strange feeling, and it stuck in my head long after riding. It was like sitting in bed after a day spent floating in the ocean, where your brain replays the sensation of the gentle motion of the waves. On a couple of the days I spent working from home, I ducked out at lunch to ride the bike around in a big circle, just to feel that motion.
The handlebar setup was interesting - they were drop bars with beautiful faux-leather bar tape, which was mangled and coming apart. It was probably not salvageable and needed replacement.
It also didn’t have proper drop bar brake levers! They were standard flat bar/mountain bike brake levers, and they were mismatched! Both of them were the left lever of different sets, haphazardly clamped to the front. This bike was a bit of a hackjob, it seemed.
I decided I would at least put the effort in to fix up the bar setup and make a functional single speed. Then I could decide whether I wanted to keep it or not.
I bought some bar tape from a local shop, and ordered the cheapest road bike brake levers I could find on amazon. What arrived was of reasonable quality - it turns out that road bike brake levers don’t cost an arm and a leg if they don’t have integrated shifting.
A friend of mine really hates having things like kickstands and fenders and even front derailluers. He likes keeping his bikes simple. I’ve never really agreed with that. I’m a bit of a maximalist, especially when it comes to my daily driver. But after installing a kickstand on this thing I sort of saw his point.
This was the first bike I ever owned that didn’t have anything built into it that would buzz or rattle or clunk around. No derailleur spring tensioning the chain. No fenders to worry about getting bent out of shape. It was also supremely light. Light enough to lift over my head with one hand. I’d never had a bike like that before.
But then I added the kickstand, and it rattled every time I dropped off a curb. The utility of a kickstand is undeniable. It’s objectively good. It’s handy. But I wanted a bike that was quiet with no spurious accessories to complicate it or weight it down. Is this reasonable and practical? Absolutely not. But if I’m going to own multiple bikes, one of them can be a little bit unreasonable, right?
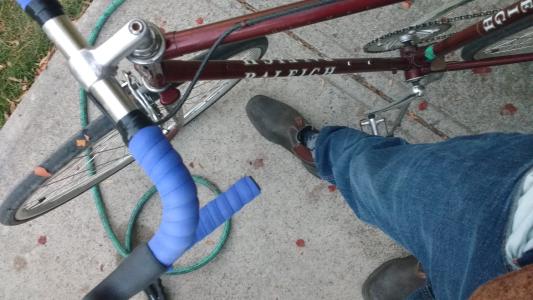
The bike was looking and riding a lot better, but it was still very far from perfect, and far from comfortable. Plus, it was extremely ugly. The shade of blue on this bar tape didn’t go very well with the rusty red of the frame. This ugly blue bar tape eventually found a home on the much brighter Peugeot Club UO5, and I ended up ordering faux-leather bar tape online.
Another lesson learned: Don’t sacrifice your aesthetic.
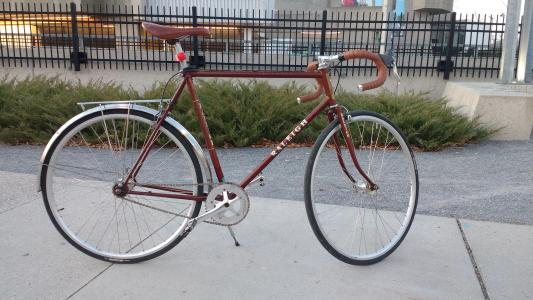
The kickstand and rear fender + rack stayed on the bike as it sat in a garage over the winter. But the following spring, I quickly to removed them both in pursuit of a quiet and light bike. Like a kickstand, a rear fender and a rear rack are also very nice to have. But for a bike like this, they weren’t worth it. The rear fender rattled and got in the way when I was flipping over the wheel and re-tensioning the chain. It was an extra part that barely offered any benefit, and introduced a number of headaches.
At this point, I thought again about getting rid of the bike, or converting it back to a geared bike with friction shifters. But then I went on a group ride organized by a coworker. The coworker in question had brought along a fixed gear bike. He told me it was because it was simple, cheap, and nothing ever went wrong with it. Plus, riding it took more energy than a regular bike, so it let him get some training in for cycling events even when he was short on time. I even watched him attach a tether to his seatpost and tow his young daughter around on it.
After some more probing questions, I was motivated to try the fixie again, more seriously this time. The first order of business was to get proper foot retention, something that I had always written off as unnecessary, or for the lycra roadie crowd. I turned out to be fatally wrong. Fixed gear bikes require foot retention, if you want to be able to climb hills or skip stop or just efficiently accelerate and decelerate.
I went to another local bike shop in search of foot straps. They seemed like the best option - clipless pedals required special shoes. I don’t like the idea of getting to a destination and being unable to walk unless I sit on the street swapping my dorky plastic shoes for more practical ones. Cycling simply isn’t like that for me. Toe cages seemed reasonable as well, but my feet are gigantic, and all the ones I’d used in the past were small or brittle enough that I ended up breaking them.
As I do every time I go to a proper bike shop, I balked at the prices. I was used to seeing panniers for upwards of $200. I was used to seeing components like shifters and cassettes being sold for $100 a piece. But seeing a pair of plain velcro foot straps being sold for nearly $70 felt particularly bad. I had shopped around online, thought about doing some DIY for foot retention, but ultimately forked over the cash. I knew that if my foot retention failed me, the resulting crash could be disastrous. If I put my faith in the cheapest piece of velcro I could import from china, I could seriously get hurt.
So with that, I bought a set of velcro straps that cost me more than the bike itself. Luckily I had compatible platform pedals lying around, otherwise I would probably have needed to spend another $100.
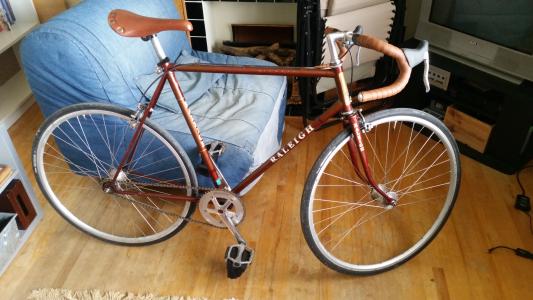
I rode around for a while, testing them out. They made a world of difference. I could reliably slow down now, could even fully lock up the rear wheel if I applied enough force. But they took some getting used to. I had an embarrassing accident where I came to a stop at a stop sign, and couldn’t wrestle my feet out of the straps in time, so I pitched over sideways and landed on the pavement at a dead stop. My pride took a bigger beating than my body.
As much as I loved the aesthetic of the handlebar setup, I was having problem finding a comfortable riding position that let me brace myself against the pedals for skip stopping. The bars were too narrow, and I wanted to have access to the brakes at any given time. I wanted steering leverage and a more upright riding position for comfort. I wanted flat bars.
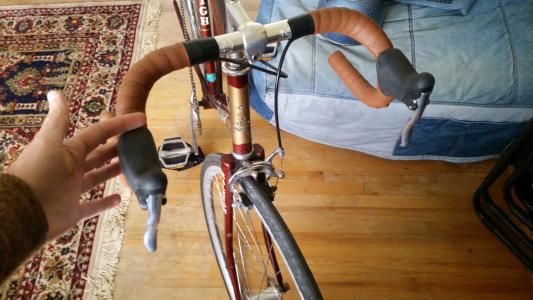
One major downside to cheap brake levers, a quill stem, and drop bars, is that any alterations to your handlebar setup are an ordeal.
In order you service your brakes, you must unwrap your handlebars. You can’t take the brake cable out of the brake levers without detaching it from the brakes and pulling it all the way through the housing. If you want to swap out the bars, you must take the levers off as well, and loosen the connection at the stem so you can wrestle the bars out of the clamp. And only once you’ve removed absolutely everything can you swap the stem.
Modern handlebar setups (especially ones with threadless stems) are much easier. You can generally replace the bars, the stem, the levers, etc independently and with minimal hassle. You can try a new stem with 5 minutes and a hex key, without even touching your brake levers. Unfortunately for me, this was a vintage bike with vintage parts. I resigned myself to the ordeal.
As a side note, I love the aesthetic of drop bars, but they seem to be worse in nearly every single way. Maybe I’ll write about that sometime.
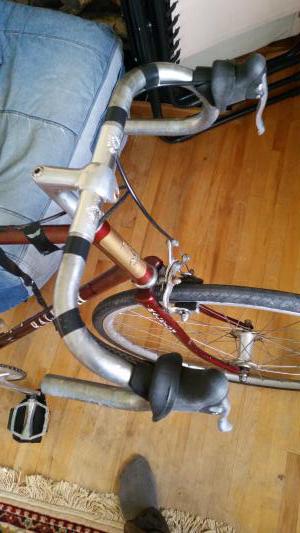
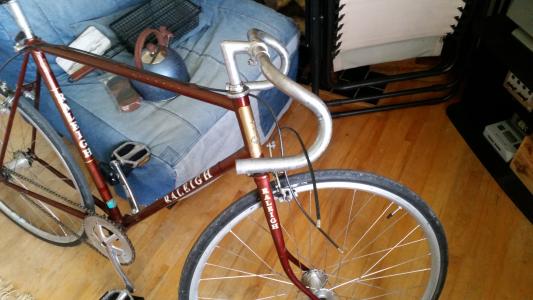
This also involved swapping the brake cables out. I had brake cables with road bike cable stops, but flat bar brake levers require a different cable stop. Why? I still have no idea. This seems like something we should standardize.
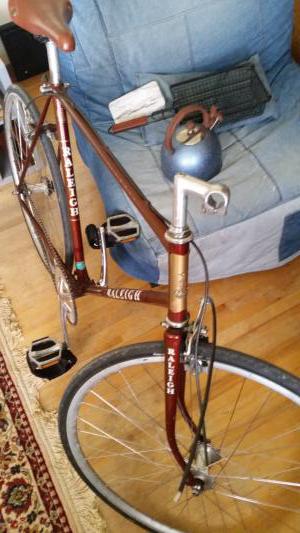
I used the parts I had accumulated from taking apart trash bikes. Sadly, this meant an ugly set of black riser bars, and my winter bike’s lock-on black grips and grotty plastic brake levers.
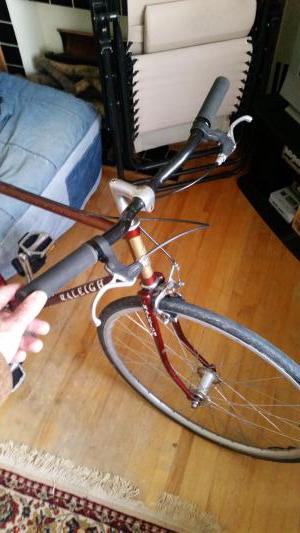
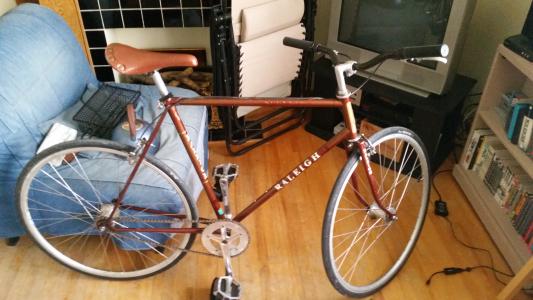
Eager to test this out, I took it for a spin. It was this adjustment that finally allowed me to appreciably skip stop. Now I could lean further forward, and actually brace against the handlebars.
Unfortunately, there was something else I was missing. After a few minutes gleefully getting up to speed and then locking up the rear wheel, I was treated to a loud snapping noise, followed by a total lack of resistance in the pedals. I brought my bike to a stop with the brakes (thankfully I’m not a psycho who rides fixed without brakes) and inspected. The chain hadn’t snapped, as I initially feared, but instead it had popped off the sprockets.
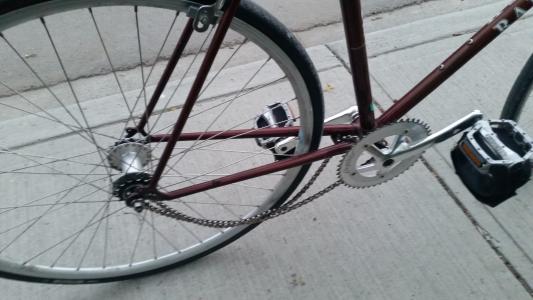
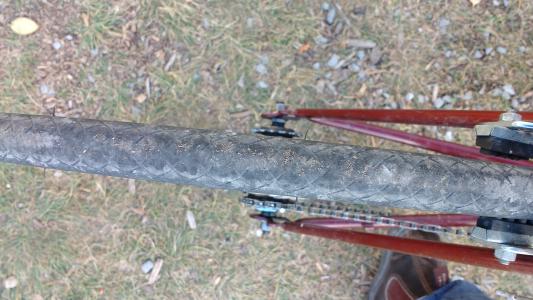
Inspecting the bike closer, it wasn’t hard to see why - my chainline was far from straight. It was at an odd, skewed angle. No wonder it had popped off - it was as if my bike was constantly stuck in a state of trying to shift gears. Online guides weren’t lying when they said a straight chainline was important for riding fixed gear, as the chain is under a lot of stress.
Fortunately, all I needed to do to straighten it out was to mount the font chain ring on the opposite side of the crankset. Less aesthetically pleasing, but functionally very necessary.
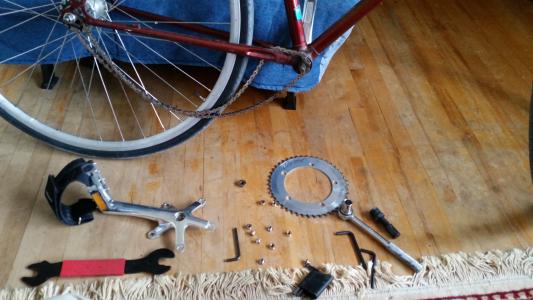
I now had a bit more experience fixing up bikes, so I thought I’d also take a look at the wheels, and ensure the bearings were okay. The rear wheel felt a little bit crunchy and had a lot of resistance, which is always a bad sign.
Lacking the proper tools for removing both the fixed gear sprocket and the freewheel on the other side, I brought the wheel into a local bike shop to have those parts quickly removed. I couldn’t be bothered to spend the money for the proper tools (about $20 for the proper freewheel remover, and $30 for the fixed gear lockring remover) so I figured I could just pay the shop a small sum to have them use the tools for 5 minutes or so. They charged me about $12 for the labour, in the end, and I regretted my decision. I think I need to be reminded constantly that tools are a worthwhile investment. Now that I’ve discovered the bike co-op at least, I won’t make the same mistake again. I’ll either buy my own tools or use the ones provided by the co-op.
I got the wheels home and fully disassembled them. If I loosened the locknuts at all, there was play. If I tightened them, there was crunchy resistance. An indication that the hub itself was worn out.
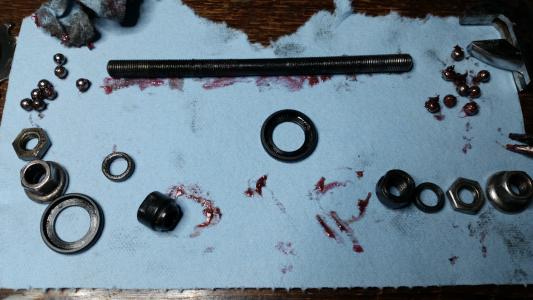
I decided to disassemble and repack the bearings in both the front and the rear wheels. Sure enough, the rear hub was indeed pitted and extremely rough. It was also missing one ball bearing. Probably the reason why pitting occurred in the first place. I replaced it with a small steel bearing that had come as ammunition for a slingshot I had gotten as a gift for my 12th birthday. Miraculously, it was exactly the same size. Go figure.
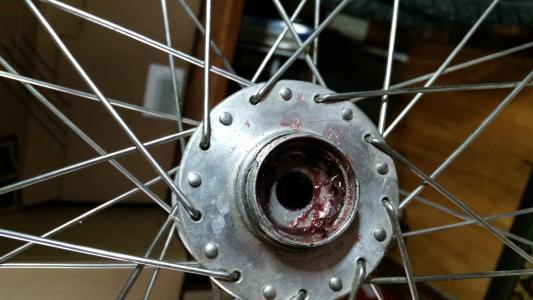
I repacked the hubs but they didn’t ride much better. The rear hub still has a bit more resistance than is desired, and I’m probably only making it worse as I continue to ride, but I like using things until they can’t be used any more. The wheelset on this bike is effectively garbage, as is the rear sprocket, and the rear freewheel. But for now, I could keep riding.
The people at the bike shop warned me against reinstalling the freewheel, as the tool fittings were quite stripped, and it may not be possible to remove it again. I figured that was probably fine, but didn’t reinstall it right away. After all, I had no interest in riding a single speed. I wanted to ride fixed.
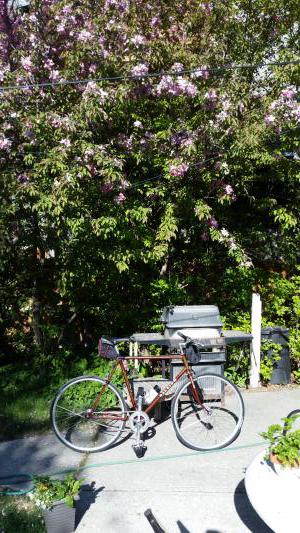
Shortly after, I reconfigured the bike with the primary goal of making it prettier. I didn’t like the black handlebars and grips and mucky brake levers contrasting with the rest of this beautiful bike. I had a shiny set of handlebars on my main commuter with some well-loved brown and gold Chromag grips. I swapped the grips and bars with this bike, turning my commuter almost entirely black and giving it the nickname Johnny Cash.
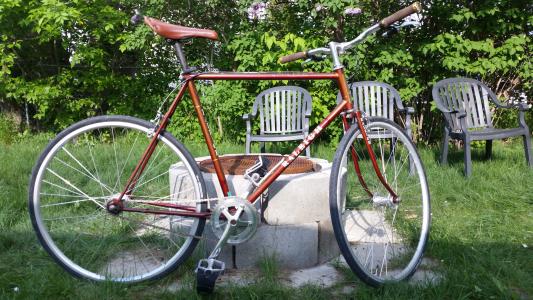
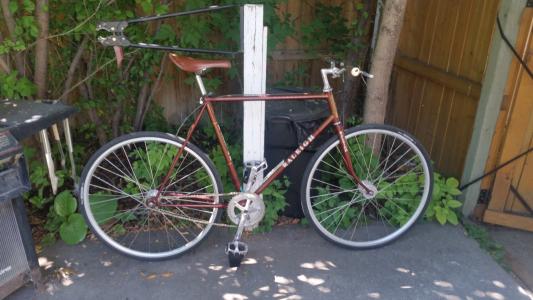
The brakes hadn’t been serviced at all since my mom found the bike at the junk exchange, so I set to doing that next. It was a simple job - disassemble, clean, grease, reassemble. But it made a big difference. Afterwards, the brakes would properly spring back into place, and the minor issue of brake rub became a thing of the past.
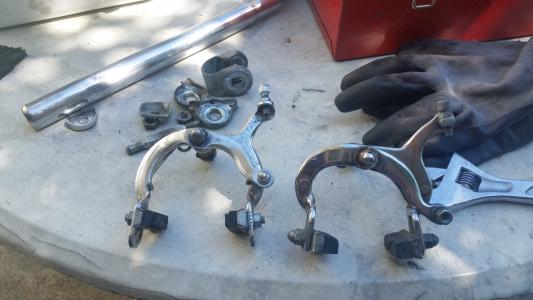
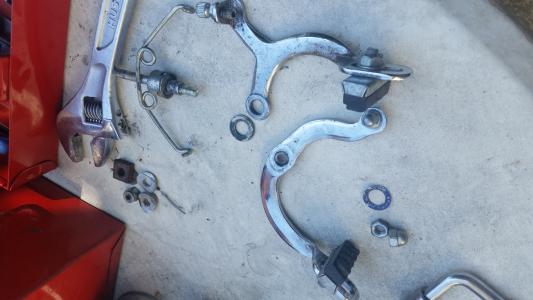
At the pivot point of the brakes, there are plastic or metal washers. These were incredibly worn out on each set of brake calipers, to the point where they were falling apart in my hands. I replaced them with washers from other brakes I had scavenged from trash bikes. Unsurprisingly, the front and rear brakes on this bike were not a matching set. Go figure.
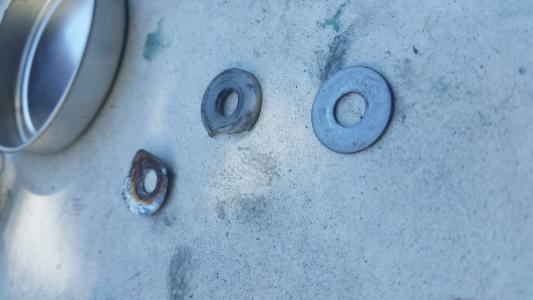
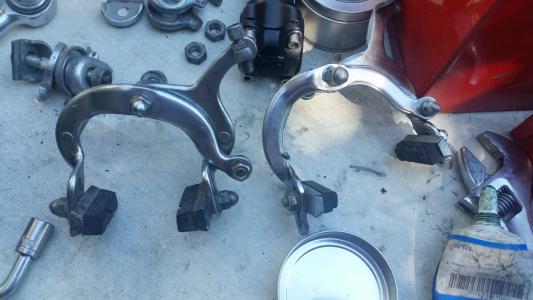
I also gave the brakes new mounting hardware to better secure them to the frame. I was pleased - now that I was becoming a more experienced rider, these brakes would probably very seldomly need to be serviced, as I could make most of my trips without even touching them. Brake pads don’t wear out very fast if they never make contact with the wheels!
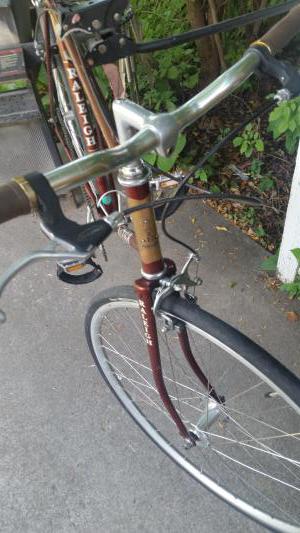
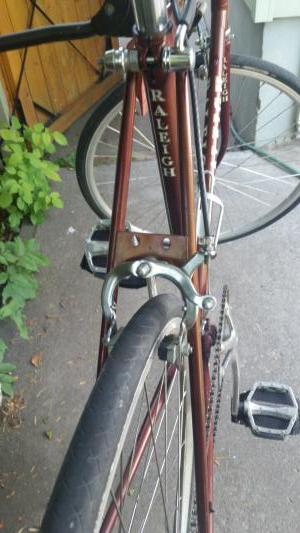
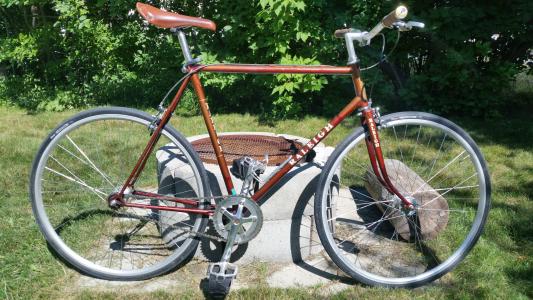
It was looking wonderful at this point, but it was still uncomfortable to ride. There were things I wanted to change in order to complete this truly useless vanity project.
In order of priority, I wanted:
- A longer stem, for better leverage against the pedals and a more comfy riding position
- Prettier brake levers, purely for vanity
- A new and nice chain, as I was still running the original one from the junk exchange. I wanted a single speed chain that’s shiny and gold.
At this point, I had discovered the bicycle co-op. So I brought the bike in to rummage through parts bins and find a serviceable stem and brake levers.
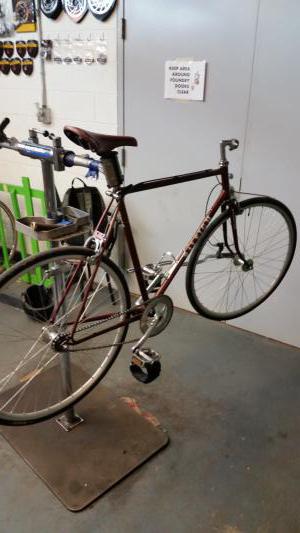
The bike co-op has secondhand parts organized into milk crates. Everything costs $5. $5 for a stem, $5 for a pair of brake levers. I came in on a quiet afternoon and rummaged around until I found something that would work.
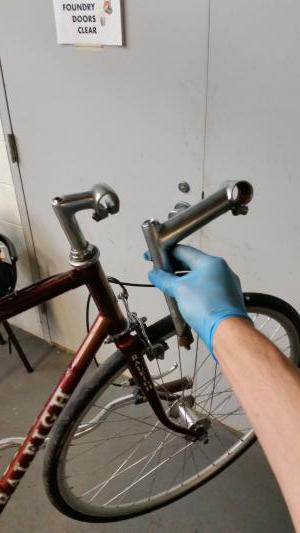
I rummaged around until I found a new stem - something longer with a lot of rise to replace the short downward-angled drop bar stem. I even found one in a shiny exposed steel finish to match the rest of the components.
Brake levers were considerably less sexy. Most were very heavy, and almost all had ugly scuffed up plastic bits. I did find one pair that stood out, however. Initially I wrote them off as a silly novelty. After all, they left the cable fully exposed and didn’t have barrel adjusters. They were beautiful, but pretty impractical.
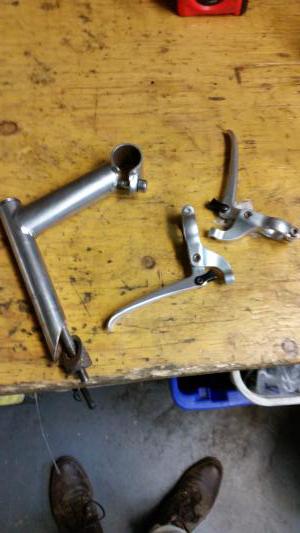
But as I kept looking, I realized they were calling to me. Beautiful and impractical? That perfectly describes the bike they’re going on. I decided I’d buy them - at $5 I’m sure they’d be worth it for the novelty alone - and installed one on the rear wheel, just to see how it felt. My brakes had their own barrel adjusters on the other end, so not having them on the levers wasn’t a deal breaker. It would probably work out.
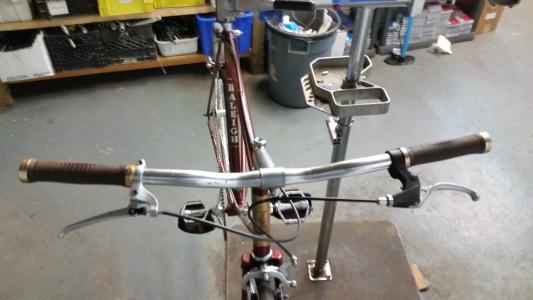
While I was there, I also re-lubed my chain, adjusted the tension, and re-adjusted my brakes. All for free. I can’t state enough how much I love the bike co-op.
The ride home felt fantastic, and the rear brake was performing extremely well. I even got to test it when a car pulled out of an alleyway in front of me and I had to stop on reflex. The braking power was just fine, no complaints or shortcomings at all. I knew that when I got home I would immediately install the other brake.
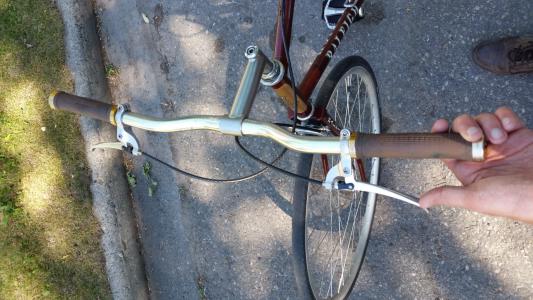
And that’s where she is in the present! Once the chain is gross or stretched out enough, I’ll drop money on a new and shiny gold chain to complete the look, and if I stay in love with it I might even hunt for a better wheelset, but for now the bike is doing great in all its impractical and beautiful glory. I sometimes commute with it. Rarely do I go appreciable distances on it. But I take it out often to grab takeout or bomb down back alleys or say hi to a friend.
Mostly, it’s just fun to ride. It’s the most useless bike I own, but I’m still getting lots of use out of it.
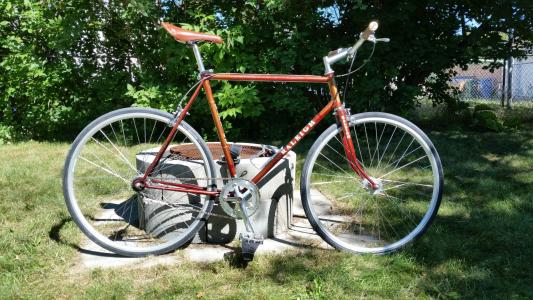
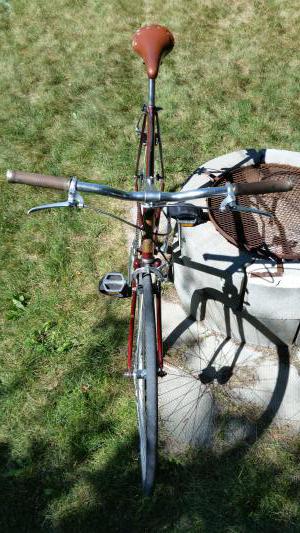
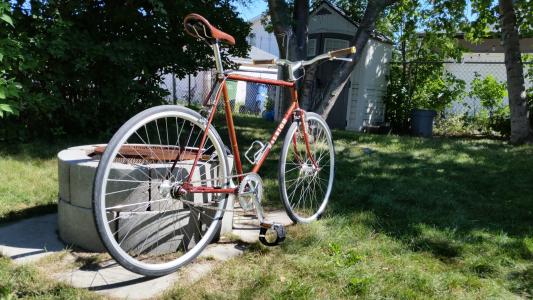
Here are some pictures of the finished product:
Cost Breakdown
I’ve included the cost of the components I didn’t end up using in the final build, but I didn’t add them to the total. Far and away, the most expensive thing on the bike is the pedal straps, because I was scared of cheaping out. I bought them from a local bike cafe, which marked up the price quite steeply.
| Item | Cost |
|---|---|
| Bicycle (From Junk Exchange) | $0 |
| Fyxation Pedal Straps | $70 |
| Brake Levers (Secondhand from Bike Co-op) | $5 |
| Stem (Secondhand from Bike Co-op) | $5 |
| Blue Bar Tape* | $20 |
| Brown Bar Tape* | $17.84 |
| Road Brake Levers* | $23.09 |
| Total | $80 |
* = Not part of the final build. Not included in total.
Things I wish people told me about riding Fixed Gear
Finally, here’s some advice that I wish I had been given before getting into riding fixed gear. I linked it above, but you really should read Sheldon Brown’s page on fixed gear bikes if you’re considering trying to ride one.
You need foot retention.
I spent a lot of time trying to slow down or stop the bike with only the pedals, with absolutely no success. I had no idea how people got enough force on the pedals to lock up the back tire until I bought pedal straps. You need foot retention to ride fixed gear safely. If you don’t have it, you are simply doing it unsafe and wrong.
Additionally, foot retention is invaluable for getting up hills, which is often a challenge when you don’t have gears. If you have foot retention, you can get a bit of extra power when pedaling, by pushing down on the front pedal as well as pulling up on the rear pedal. Once I installed foot retention, I was surprised at how many hills I was now able to tackle with a single high gear. It’s exhausting and inefficient compared to using a more suitable climbing gear, but it’s better than having to walk your bike up the hill!
Skip stopping works best if you do it as part of a turn
Every guide on skip stopping will tell you to lean forward over the handlebars to get your weight off the back wheel, press down on the pedal in the rear, and pull up on the pedal in the front using the foot strap to lock up the wheel. What they don’t mention is that doing this while going in a perfectly straight line is difficult. Generally I would lock up the wheel for a second, and then my foot would slip, or I’d slow down enough to change the coefficient of friction and pull the wheel back into rolling. My stops were jerking and uneven and inelegant. Maybe slicker tires of stronger legs or a different gear ratio could change this, but I found out on my own that a much more elegant and even way to skip stop was to do it at an angle, while turning.
If you lock up your wheel as you begin a turn, you can send the rear of the bike sliding around in an arc, making it easier to keep the wheel locked, and stopping much more smoothly and efficiently. This method is especially useful if you’re slowing down into a turn, since you can sort of drift around corners while reducing your speed. You’ll also feel like you’re doing the iconic Akira bike slide.

However, you will not look like you’re doing the Akira bike slide. You’ll probably look more like you don’t know how to ride a bike and you just hit the brakes way too hard. People may turn their heads in alarm when they hear your tires slip, under the assumption that they need to get out of your way before you fall over or crash into a wall. Try to be courteous and not alarm anyone with unnecessary skidding around.
It’s important to remember that you don’t actually look cool, so that you’ll only skip stop when absolutely necessary.
Your handlebar setup matters
I ended up swapping the drop bars out for wide flat bars for a reason - I needed leverage in order to exert force on the pedals. If you’re pushing back on pedals, you need something to brace against. There’s no getting around that. The only thing you can actually brace yourself against are the handlebars. If you want more leverage against the handlebars, wider handlebars are a no-brainer. Not only do they give you more leverage against the pedals, they also give you more leverage for finer control over turning your front wheel, resulting in a more stable ride overall. If you have a narrow set of of drop bars, this leverage is more difficult to achieve.
A longer stem also lets you lean further forward, and take more weight off the rear wheel.
Some riders are seasoned enough (or strong enough) that they insist on riding with narrower drop bars, but I’m a beginner. I want my brakes accessible in case I need them, and I want to be comfortable, and I want to have the maximum amount of leverage for locking up the wheels.
Take this bike for example:
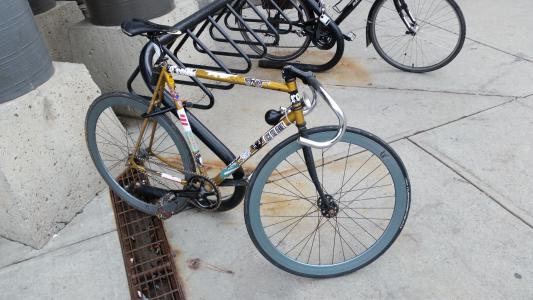
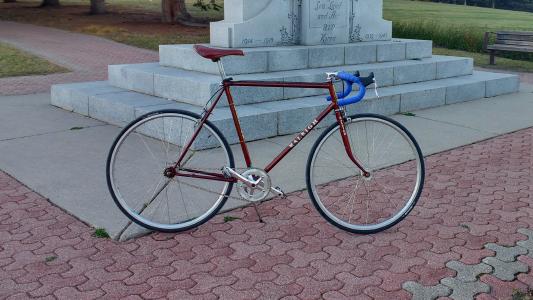
It’s got incredibly skinny, treadless tires, the most aggressive riding position I’ve ever seen, no brakes, deep aero rims, and only a single toe clip for foot retention. This bike is built for hunching over and going extremely fast, without turning or stopping. The only way for the rider to reliably stop is to skip stop while the right crank is in the front and the left crank in the back. If the toe clip fails or the chain breaks or pops off the sprockets as mine did, stopping isn’t possible. The handlebars are also incredibly narrow and low, with no tape for purchase, so getting enough leverage to actually lock up your wheel may prove difficult.
In my opinion, if you ride this bike, you’re endangering yourself and you’re a burden on everyone around you. By using public roads and pathways, you’re making it everyone’s problem.
Recognize you are doing something fundamentally impractical
Fixed gear bikes are stupid. Riding a fixie when other options are more available and practical is like insisting on commuting via unicycle. Recognize that you’re doing it because it’s fun not because it’s safer or better.
Also recognize that the fixed gear boom is partially caused by the prevalence of fixed gear bikes among bike couriers in cities like New York. But couriers in New York don’t ride fixed gear because it’s better. They ride it because it’s cheaper and there’s less risk of mechanical failure, less maintenance, and fewer parts to lose to theft or accidents. Couriers often ride fixed gear bikes because of the harsh logistics of poverty. And now their rise in popularity has resulted in the gentrification of fixed gear bicycles, driving up the cost of parts and making these logistics even harder.
A fixed gear bike is fun to ride, it gives you a great idea of the physics of riding, connects you to a community of enthusiasts, and allows you to get a sense of what early cycling was like before the advent of gear selection. But a bike with a freewheel setup and multiple gears is more practical in nearly every single case, and you are not a better cyclist for riding fixed gear.
That’s all for now. It feels good to finally document this adventure I’ve been having. Until next time!