The Joker: The Bike
Tagged: bike project diyFor a long time I’d been looking at folding bikes with muted desire in my heart. I didn’t particularly want to buy one, since I didn’t really need one. I also didn’t imagine they’d be that nice to ride. Full sized bikes are more modular and practical.
What I really wanted was to play with one. Fix one up. The problem is that most of my bike stuff comes scavenged out of back alleys, and not a lot of folding bikes get thrown out. I figured maybe at some point I’d get the opportunity. I didn’t think it’d be so soon.
Coming home from work one day, I spied a folding bike just sitting there in the alley.
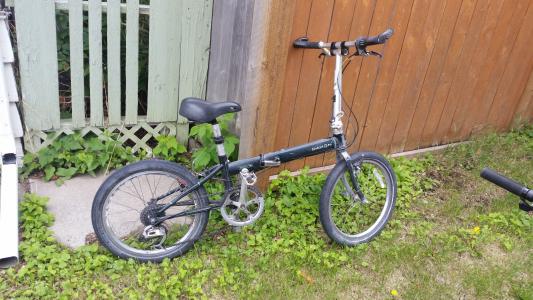
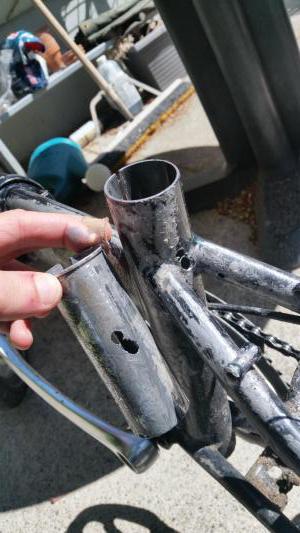
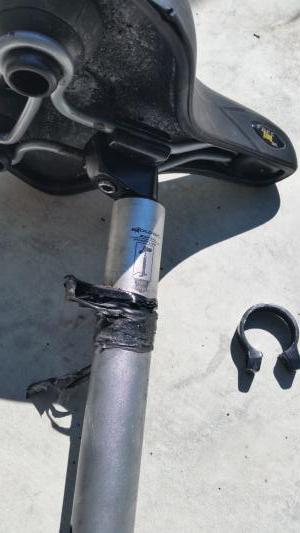
My first thought was, of course, that it wasn’t being thrown away. It seemed too good to be true. But a closer inspection revealed that one of the brakes was completely missing (generally a sign that the bike isn’t being actively ridden) and the seatpost clamp was gone, and several jury-rigged solutions had been attempted to remedy this. It was covered in electrical tape, had a too-small seatpost clamp unattractively wedged on, and even had a few holes haphazardly drilled through the seat tube and seatpost. Perhaps this was a desperate attempt to keep the seat in place. The paint job was also completely scuffed on one side, and the guard on the front chainring was snapped.
Seeing the bike in this state and in this place - laid out beside the garbage bins - confirmed it. It was glorious trash, lovingly laid aside in hopes that someone would take it and put it to better use.
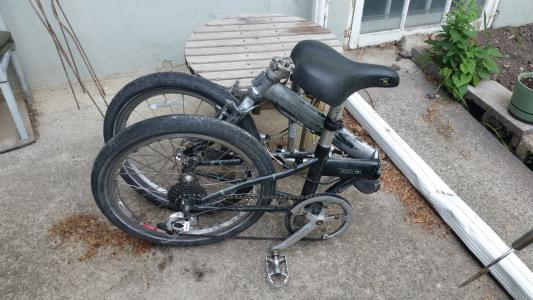
That someone is me. Delighted, I took it home and got a closer look.
Inspection
The bike had a few silly things wrong with it. It was definitely the subject of someone’s misguided DIY endeavors.
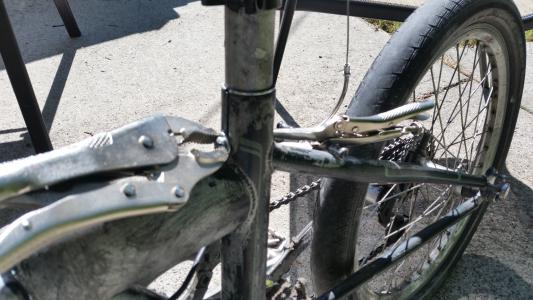
First was the bolted seatpost. The bolt was seized and hard to access, so I had to use a couple vice grips to loosen it for removal.
The damage didn’t end there, either. The seatpost itself is a fancy model from Dahon that doubles as an air pump. It’s nifty! But of course, it’s useless now that it’s been drilled through. There something loose rattling inside of it now, and the other parts that allowed it to function as a pump have been snapped off. I also had to re-attach the cushy seat to its little rails, as one of the screws that was doing so had gone missing.
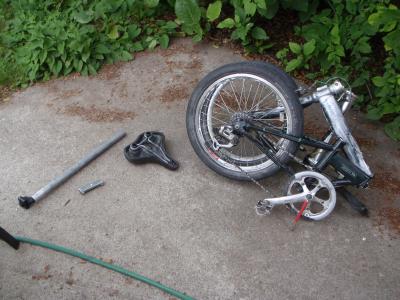
Another small bit of trouble came from the stem and head tube. It’s got an interesting (and probably proprietary) way of attaching the front fork onto the frame. Probably a proprietary one. It involved sealed cartridge bearings that I wasn’t able to remove from the frame, and a bunch of spacers with a 10mm hex-bolted end cap. The stem hinged near the base, and the bottom part was designed to be seated just under the end cap.
To take it apart I needed a 10mm hex key, which I surprisingly didn’t have. I ended up needing to buy a full new set just to get one.
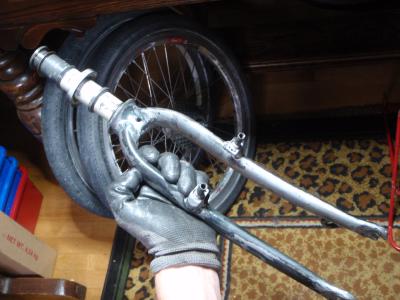
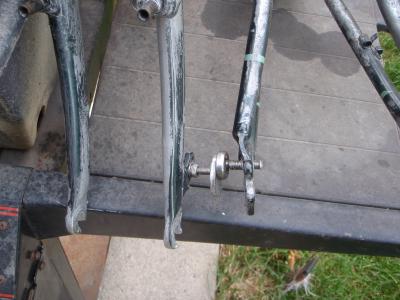
The next thing I investigated was the paint. The non-drive side of the bike looked like someone had attempted to scrape the paint off, but upon closer inspection I realized that they had apparently tried to paint it silver. With what, I’m not exactly sure. The paint was still a teeny bit tacky and came off greasy and dirty on my hands.
I still don’t know what this is, but I made the decision to sidestep the entire issue by repainting the frame. I would scrape off this gross layer, and then sand the main coat down to the paint but not down to the metal. That way I could skip the priming step. I even still had a little bit of spraypaint left over from my Purple Cruiser.
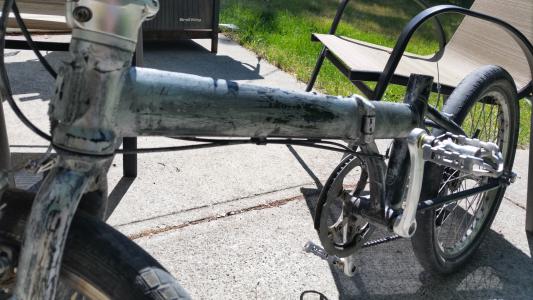
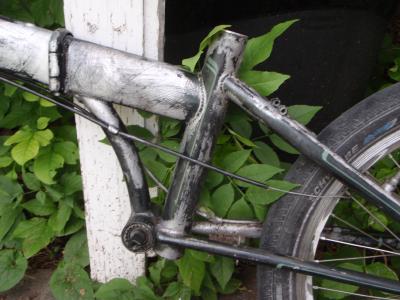
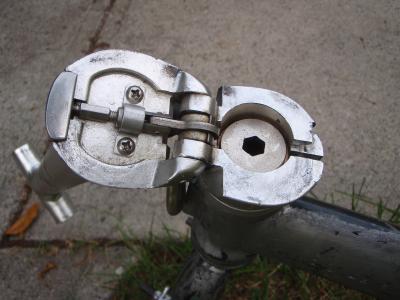
One small complication was the hinge - I figured I could disassemble it and work on the bike in two parts, but it seemed my Dahon was missing a tool fitting on the hinge assembly (I found other pictures and guides online for disassembling the hinge, and one of the guides matched my model). Either that, or the tool fitting was completely stripped, leaving only a round divet in the hinge pin. No problem. I’d just do some unwieldy sanding, and creative masking, and tedious clean-up.
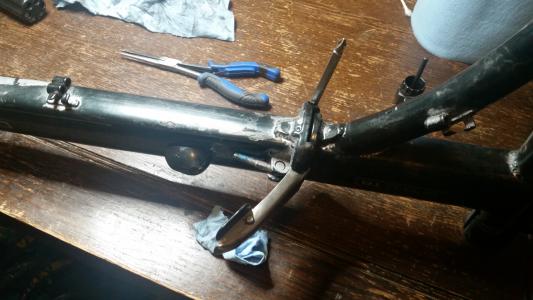
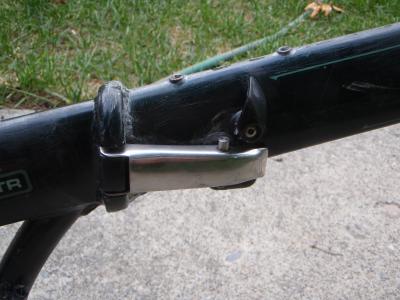
Sanding took quite a while. I ended up taking parts of the bike with me to a buddy’s model painting nights, and sanding the fork and frame down as a side activity while we were hanging out. I don’t recommend it - it was quite messy, and I needed to sit on a tile floor surrounded by newspapers while making frequent trips outside. Sanding is outdoor work for sure.
Painting
Once the fork was sanded, I got a drop sheet down outside and started doing thin coats of paint throughout the day while working at home. It was a hackjob affair. I just draped the drop sheet over the fence and hung the parts from some twine.
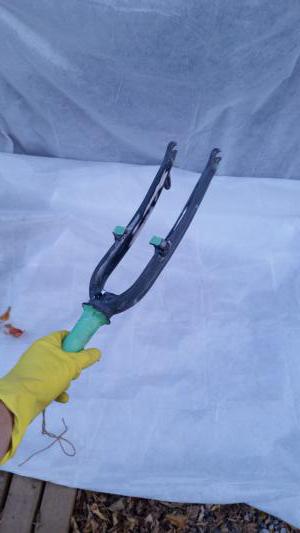
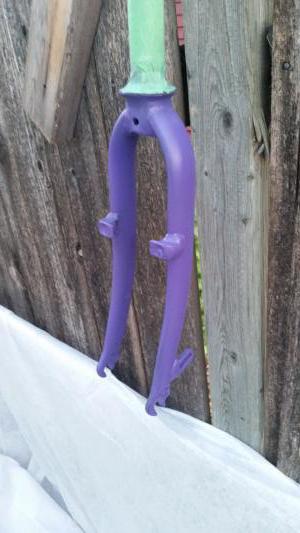
Winter was fast approaching, and so I had very limited time left to get this done. I had found the bike in the summer, but hadn’t had time to work on it since I was preparing for a move. During that time it mostly sat in my basement, still mostly assembled, abandoned and neglected.
But I really, really wanted to get it done and test it out before I’d have to put it away for winter. So after the move, while I still had most of my things in stacked up boxes, I got to work.
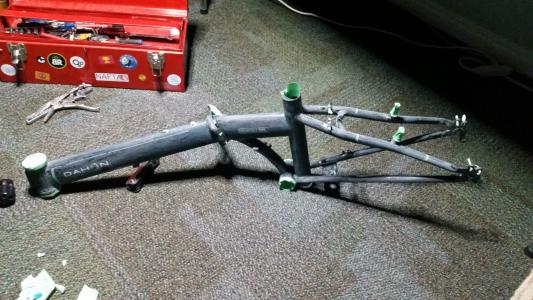
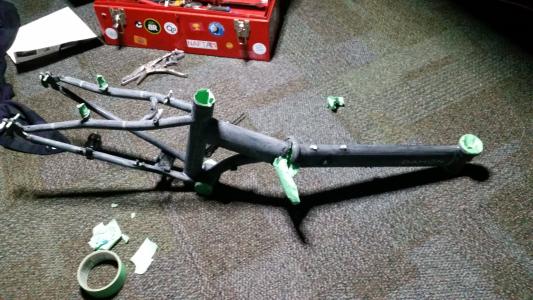
Sidenote: All this green masking tape I had came from a construction site. They threw away about 10 rolls of masking tape that were each about 90% used. It’s terrible for storage, but it’s lasted me quite a long time. Shoutouts to the drywallers / painters who gave me this gift.
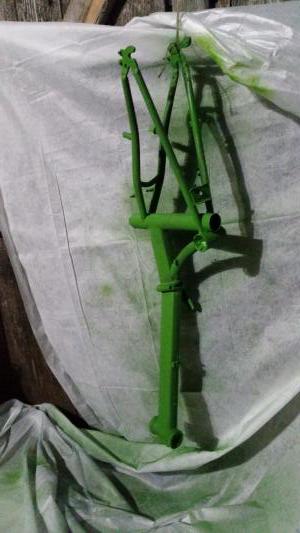
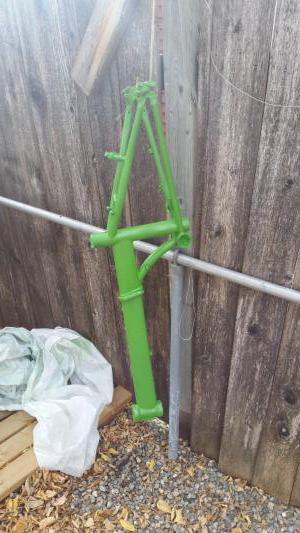
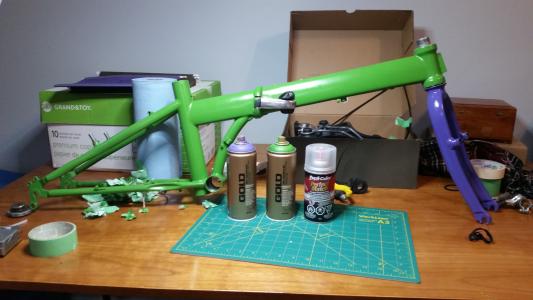
For cearcoat, I used Dupli-Color Perfect Match touchup. It probably isn’t the best choice, but it’s automotive grade and comes in a small can. The colours themselves were from Montana Gold, which is an acrylic spray paint that’s mostly marketed towards street/graffiti artists. Acrylic is probably not the best paint choice for bike frames, but Montana’s colour options are very good and their UV resistance is also apparently decent. Plus, I get to support my local independent art store. I figured it wasn’t that important in any case - since this was a folding bike, it would be living indoors most of the time. It wouldn’t have to endure bad weather.
Assembly
I peeled off the masking tape and let the paint + clearcoat cure for a few days before I began assembly. As for parts, I didn’t really need much. I’d use the same wheels and drivetrain and handlebars, etc etc. But I’d need a new chain and an extra set of brakes.
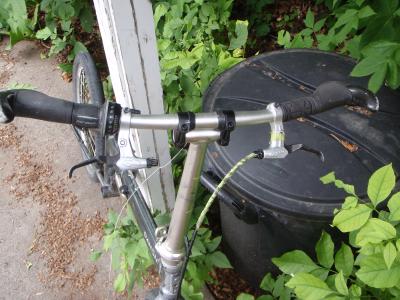
I had a nice realization at this point. I wanted to get new cable housing, because the old stuff was wearing out. But I opened up my project box and realized that I had already done this shortly after bringing the bike home. I had already measured the cables I needed, gone to my local bike co-op, cut the cables, crimped the ends on, and brought them home. I had simply forgotten in all the chaos of the move.
This is the power of good habits, I think. Past-Ironykins, I salute you. I want to thank you for being good at your hobbies and taking such good care of me.
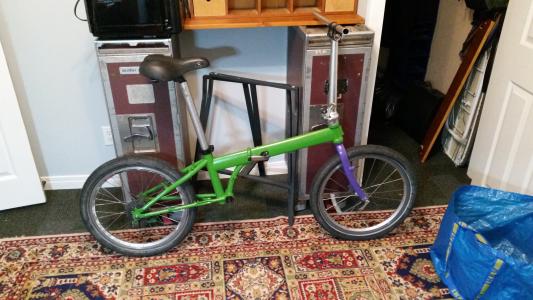
Some of the parts needed some extra cleaning - there was tape reside over the stem and handlebars. And eventually I may look for new wheels and tires. But for now, the Schwalbe Big Apple tires are still going strong. They look cute and feel very stable.
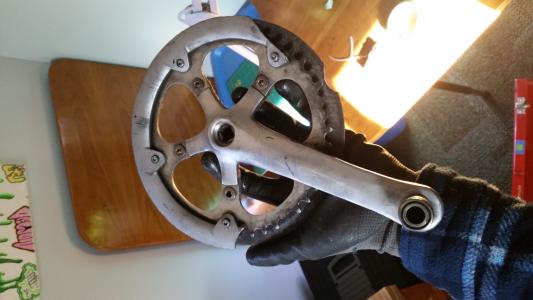
There are some bummers here as well - the front chainring came with this little guard piece to make sure that the chain wouldn’t slip off. Usually these things are optional, and they’re nice for making sure you don’t get a pant leg caught in the chain. But this one was broken, so I tossed it.
It wasn’t till later when my chain slipped off a few times as I was riding, that I realized this piece was probably important. Oh well, I’ll find another one sometime.
Another feature of this bike that’s novel to me is the ability to remove the pedals. Fancier folding bikes have pedals that can fold flush with the cranks, but this is also pretty cool.
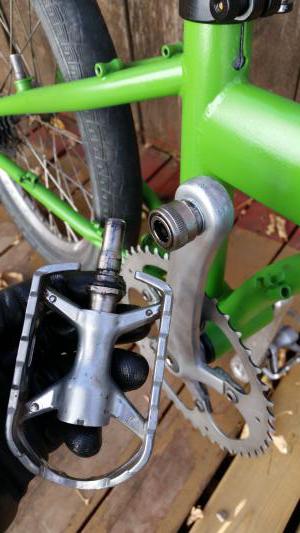
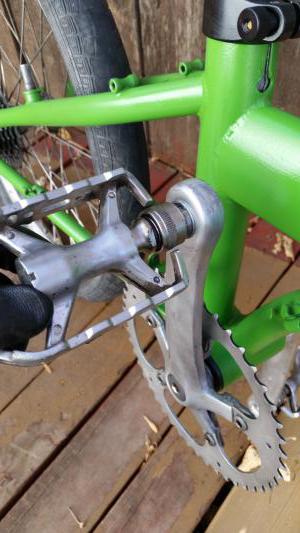
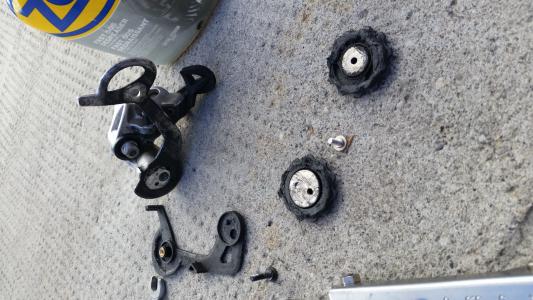
The only tedious part left was cleaning the components. I did the standard rear derailleur pully disassemble + scrape + degrease. I figured the SRAM derailleur would be low quality and need replacement, but it actually performs quite nicely! I’ll be keeping it on for now.
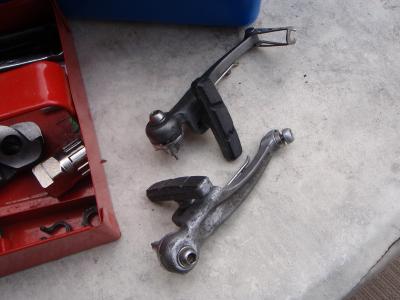
I also needed a new set of brakes for the back, since it was missing those when I found it. I did some cursory measurements and found out that luckily, the distance between the pivot bolts and the rims was the same as my other bikes with v-brakes. I took out a very pretty set of v-brake calipers I had found at the bike co-op a while back, and stuck them on. The bike also got brand new brake pads. I feel like it deserved them.
The last thing I wanted to add was new brake levers. I didn’t like the look of the old ones much, and I was having a hard time getting the tape reside off of them. Plus, I had just found some with anodized yellow levers, which I thought looked cute. The bike was already colourful so there wasn’t any sense in holding back. I did keep the grip shifter (for ease of folding) and the bar horns (for comfortable hand positions).
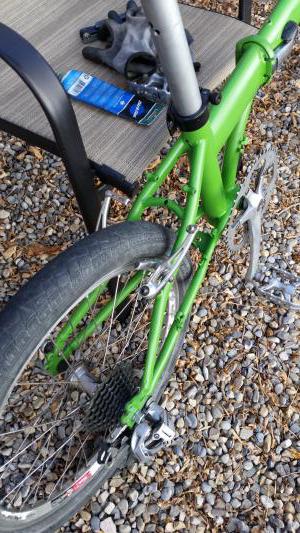
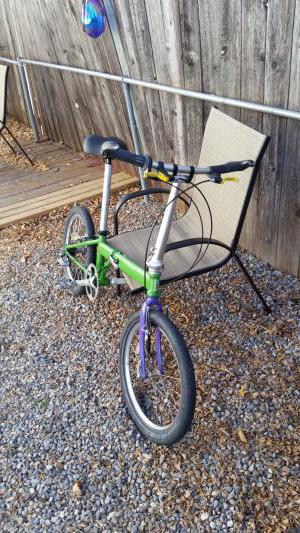
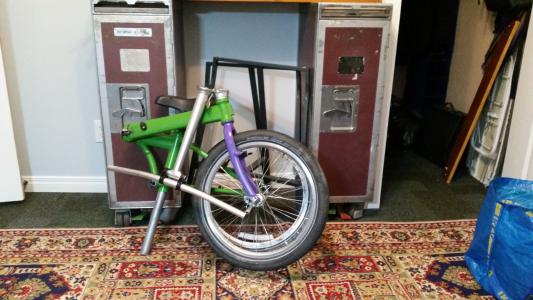
Putting it together was a fun little exercise. It wasn’t much different from assembling a regular bike, but I had to pay a little bit closer attention to the cable routing to make sure it could fold down comfortably. I also had to remount the plate, spring, and magnet mechanism that held the hinge closed when it was folded.
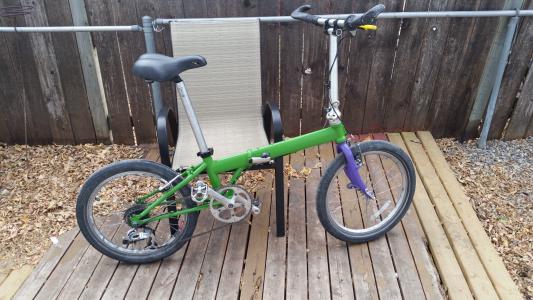
After assembly, I took it for a ride, zoomed around for about an hour, and concluded that the bike rode upsettingly well. I hadn’t even spent much time tuning the gears but the indexing worked great, without skipping. It wasn’t super fast, but it climbed just fine. The brakes weren’t properly adjusted yet either, but their stopping power was fantastic and they weren’t squeaking or rubbing. It was immediately a very rideable bike.
When I finished, the sun was setting and a chill was in the air. When I awoke the next morning, we had gotten over 10cm of snow! So I was able to complete my goal of finishing before winter hit, but just barely.
Luckily, that snow didn’t stick, and I was able to ride the bike around and fine-tune the gears and brakes a little bit more before finally putting it away. At time of writing, winter is in full swing, and this bike is tucked away in my laundry room.
Usage
This bike (The Dahon Speed TR) isn’t especially fancy or well designed for a folding bike. I’ve seen bromptons that fold elegantly and compactly, and can even be used as small shopping carts or trolleys on caster wheels while folded up. This bike is about as cheap as you can get without being junk. But that’s okay! It’s still compact enough that I can throw it in the trunk of a sedan for easier carpooling and ride coordination.
Plus, it’s one-size-fits-all and highly adjustable, so if someone is staying over and wants to borrow a bike, this one is readily accessible. I don’t see myself using it for grocery runs or joyrides but it’s small, adorable, and exactly the type of toy I wanted to build & play with.
As for the name, it seems like I picked an unfortuante colour scheme. Nearly every person who has seen the bike has told me it looks “Like The Joker”. I swear this wasn’t intentional. I just like this shade of purple and wanted to use the rest of the paint I had, and I also wanted a bike with a bright, deep green body. I think both these colours are beautiful. They remind me of Eva Unit 01 from Neon Genesis Evangelion. But the predominant green with the purple fork has branded this a joker bike.
I even rode this bike to visit my parents, who have never heard of the Joker and don’t have the same pop culture brain poisoning that people my age do. It was nice to hear them compliment the colour scheme on its own merits.
But I’m a tall man (About 6'2" or 188cm) and I look a little bit silly on this tiny bike with its tiny wheels and its seat all the way up. So as I was leaving, my mom laughed at me and told me to have fun on my “clown bike.” So I guess it’s official. I’ll be installing a little clown horn instead of a bell when I dig it out in spring.
Cost Breakdown
| Item | Cost |
|---|---|
| Dahon Speed TR, from Garbage | $0 |
| 40mm Seatpost Clamp | $14 |
| V-Brake Arms | $5 |
| Brake Levers | $5 |
| Cables | $8 |
| Cable Housing | $10 |
| 8-Speed Chain | $12 |
| New Brake Pads | $10 |
| Total | $54 |
In the future I’d like to find a rear rack that fits on the back. I’m sure one will show up in a parts bin eventually, but it’s a bummer to not be able to carry very much while riding this. The extra handlebar clearance is nice because it means I can stick bigger bags on the front, but I like having weight on the rear wheel and of my way.
Once the tires go, I think I’d also like to kit it out with some silly looking flashy BMX tires. Maybe even get some white ones so the colours match the joker more closely. May as well commit to the bit, am I right?
I am resigned to my fate. This bike is officially named “The Joker.”