The Apollo Aspire
Tagged: bike diy projectLate in the winter of 2022 I found a suspiciously nice bike in a back alley. It was a black and blue Apollo Aspire. Aside from missing a wheelset, it was in good shape. Finding a bike that nice was suspicious in its own right (hydro disc brakes and a solid groupset are rare things to find in the trash, usually all you find are department store bikes) but even more suspicious was the lock that was still haphazardly attached to the frame.
I contemplated for a while before bringing it home. It was discarded behind a dumpster behind a municipal building, covered by a cheap blanket and buried in snow. My guess was that it was stolen. The thief had probably already sold the most valuable part - the 650b wheelset with disc brakes - with the intent of coming back to pawn the rest. Either that, or someone had ditched it after the wheelset had been stolen. But it had been there for clearly a very long time, judging by how buried in ice and snow it was. Indeed, it took some chipping away with a screwdriver to get it to come free of the ice.

I checked our local police database to see if I could find anything matching its description. No dice. It had probably been missing for a while. Without any leads to follow, I decided to invoke the Finders Keepers rule.
Now, if you see this bike and recognize it as your own, or you know who it belongs to, please contact me. I’ve since restored it back to functional and taken it on a few rides, but it would make me happier if I could reunite it with its original owner. I’ve had bikes stolen and I know how bad it feels. So if you can prove it’s your bike, I’m very happy to deliver it to you.
Shortly after I brought it home, I disassembled it entirely, and sorted the parts into containers. I put the frame in my basement and largely forgot about it for the next 6 months. At this point, I had no idea that hydraulic brakes were even I thing. I ended up unscrewing the front brake hoses and leaking brake fluid all over the floor in my basement. It was a nasty surprise, and in trying to screw the hose back in, I broke the wrench flats. I had a similar mishap later on while trying to adjust the rear hydro brake. I didn’t unscrew the hose this time, but I did separate both halves of the brake caliper, and nearly lost the gasket that sits between them. I’m sure this caused a catastrophic loss in brake fluid pressure. This would come up a bit later.
After the failure that was Trug, I decided that I would try building a proper mountain bike with this frame. It would be a more solid foundation to start with.
The Build
In early September, I started assembling the bike with most of its original parts. I didn’t document this build in as much depth as previous builds. Mostly because I’ve built enough bikes now that it’s starting to become routine.

The wheels were from my roommate’s abandoned Kona COP Special. They’re 26" (so technically undersized for the frame) and the rotors are woefully out of true. But they spin, they’re high quality, and the rotors are correctly sized for the brakes I have.
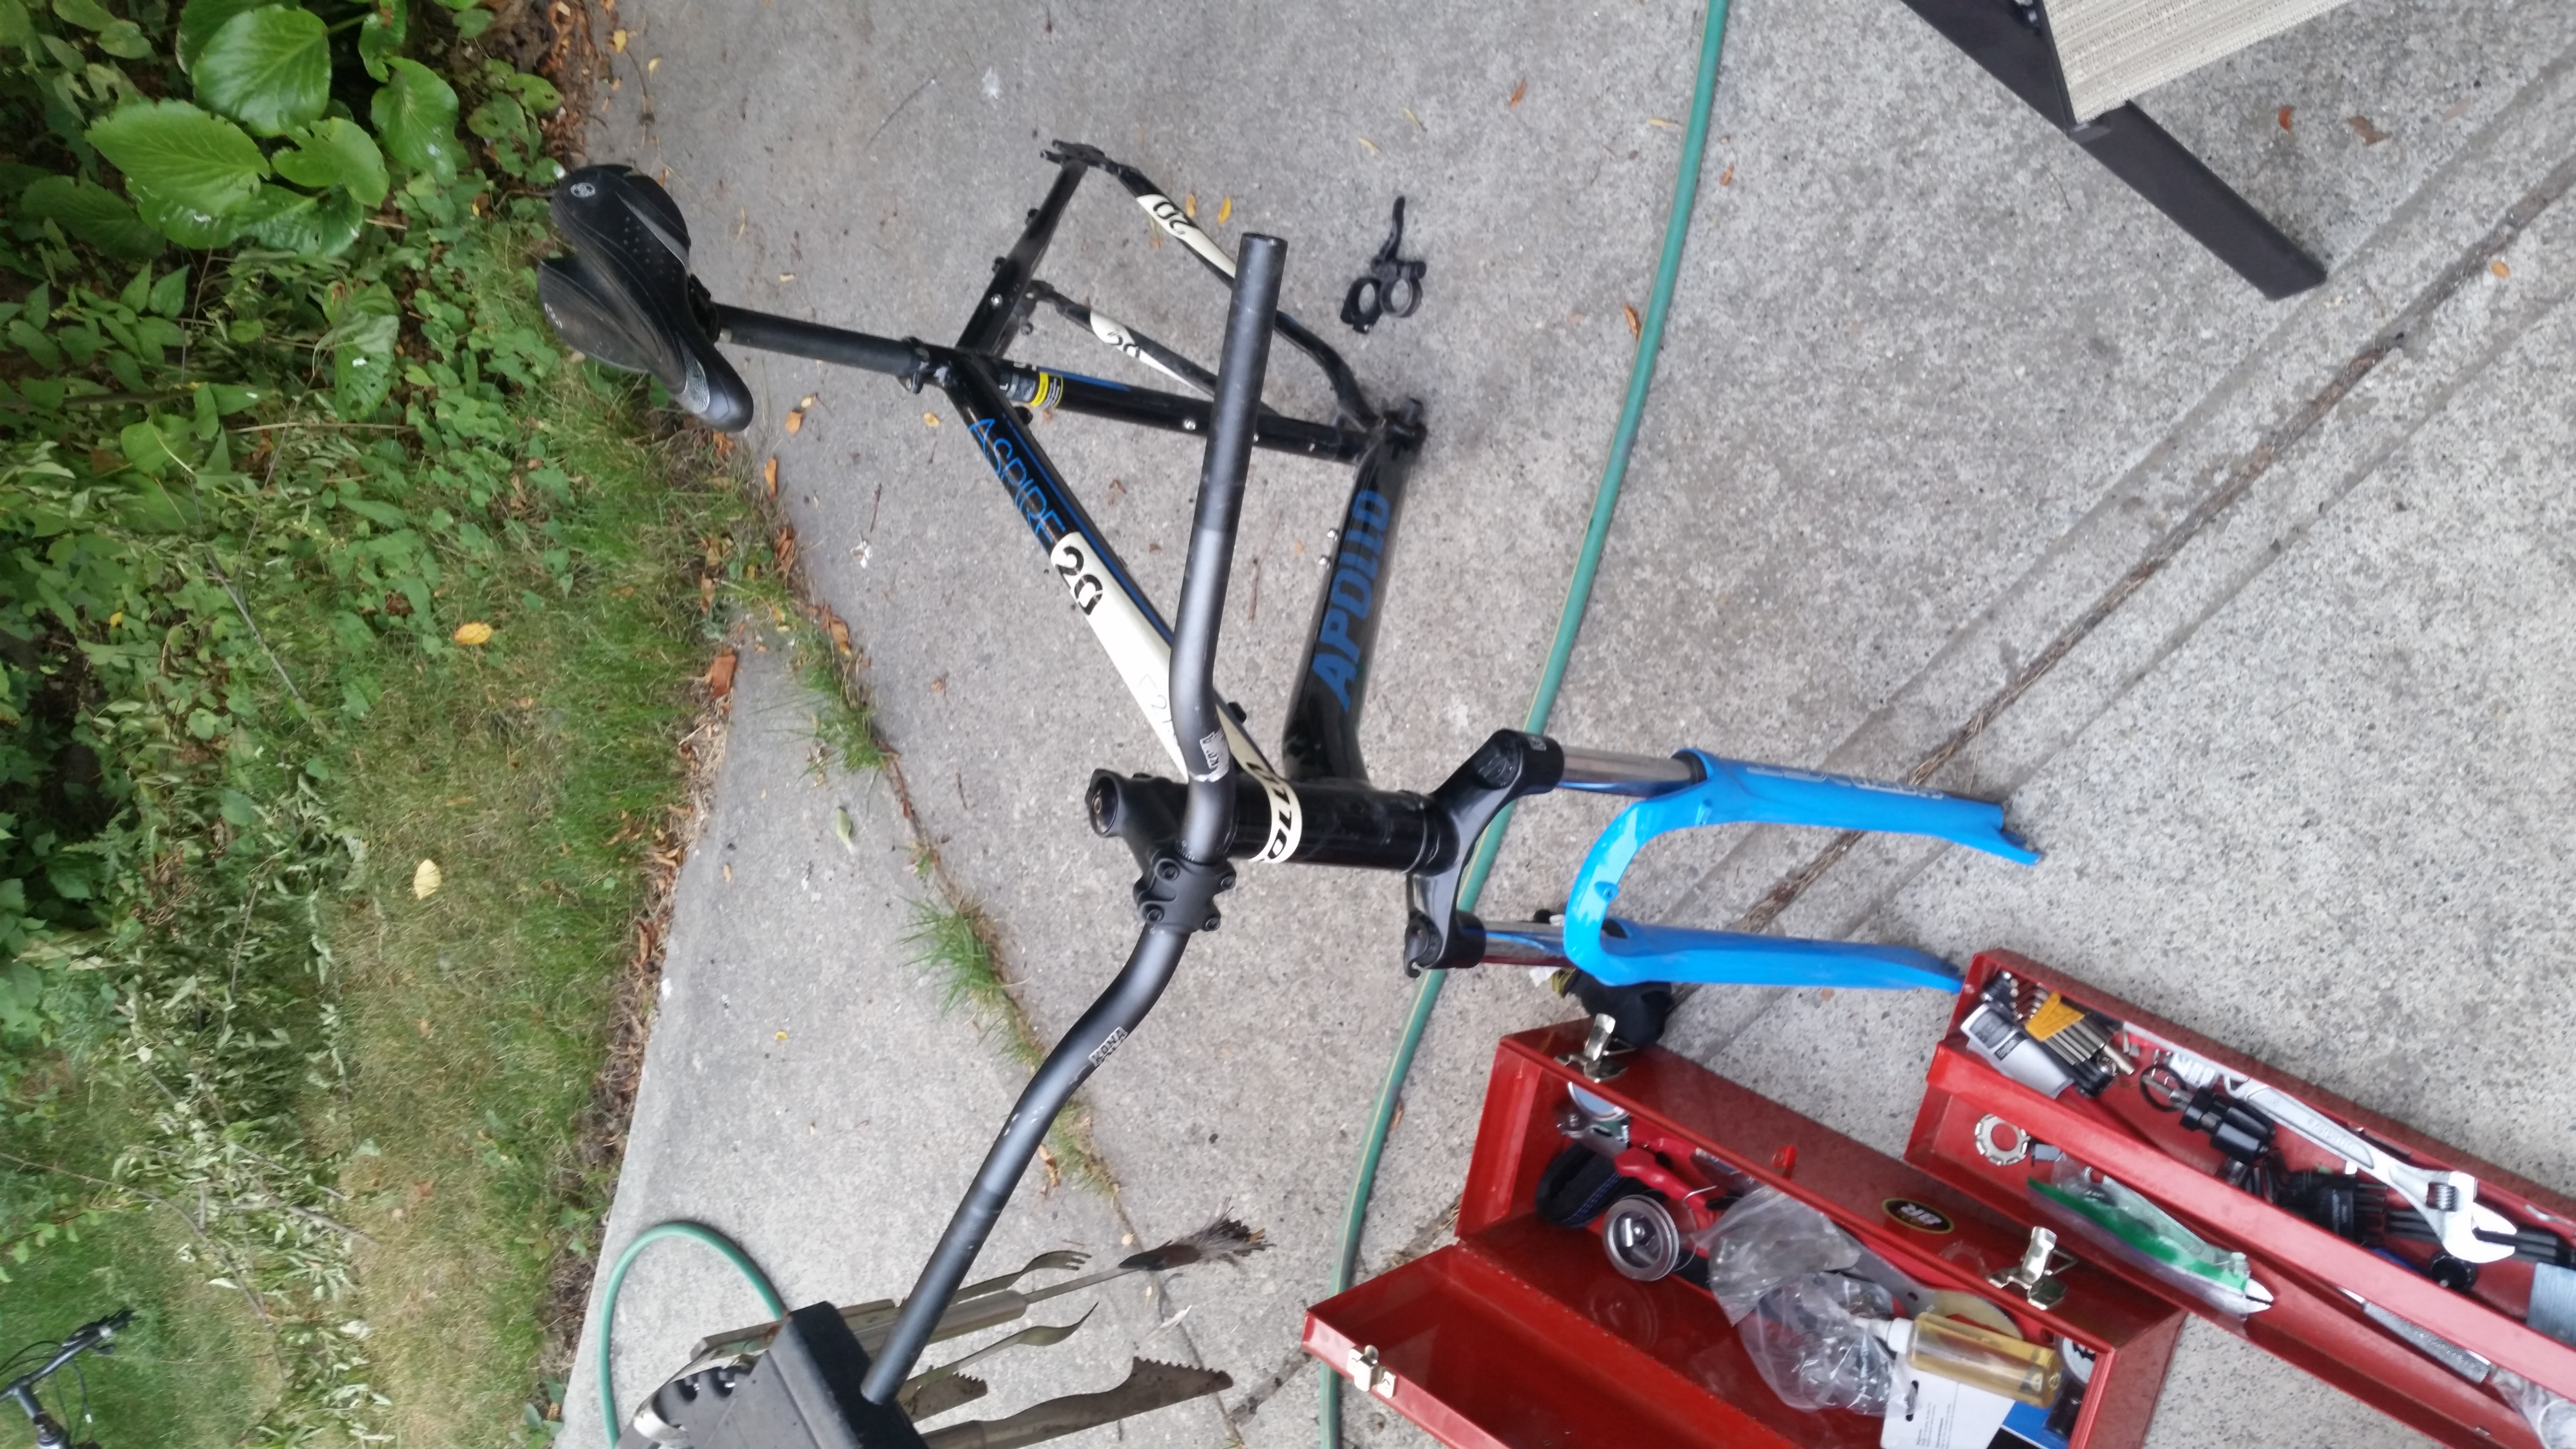
Since I had ruined the front hydro brake, I used the single front mechanical disk brake that I own and had previously used on Trug. For the rear, I used the low-pressure hydro brake. The fluid pressure was noticeably low, and the braking power left a lot to be desired. This would need to be fixed.
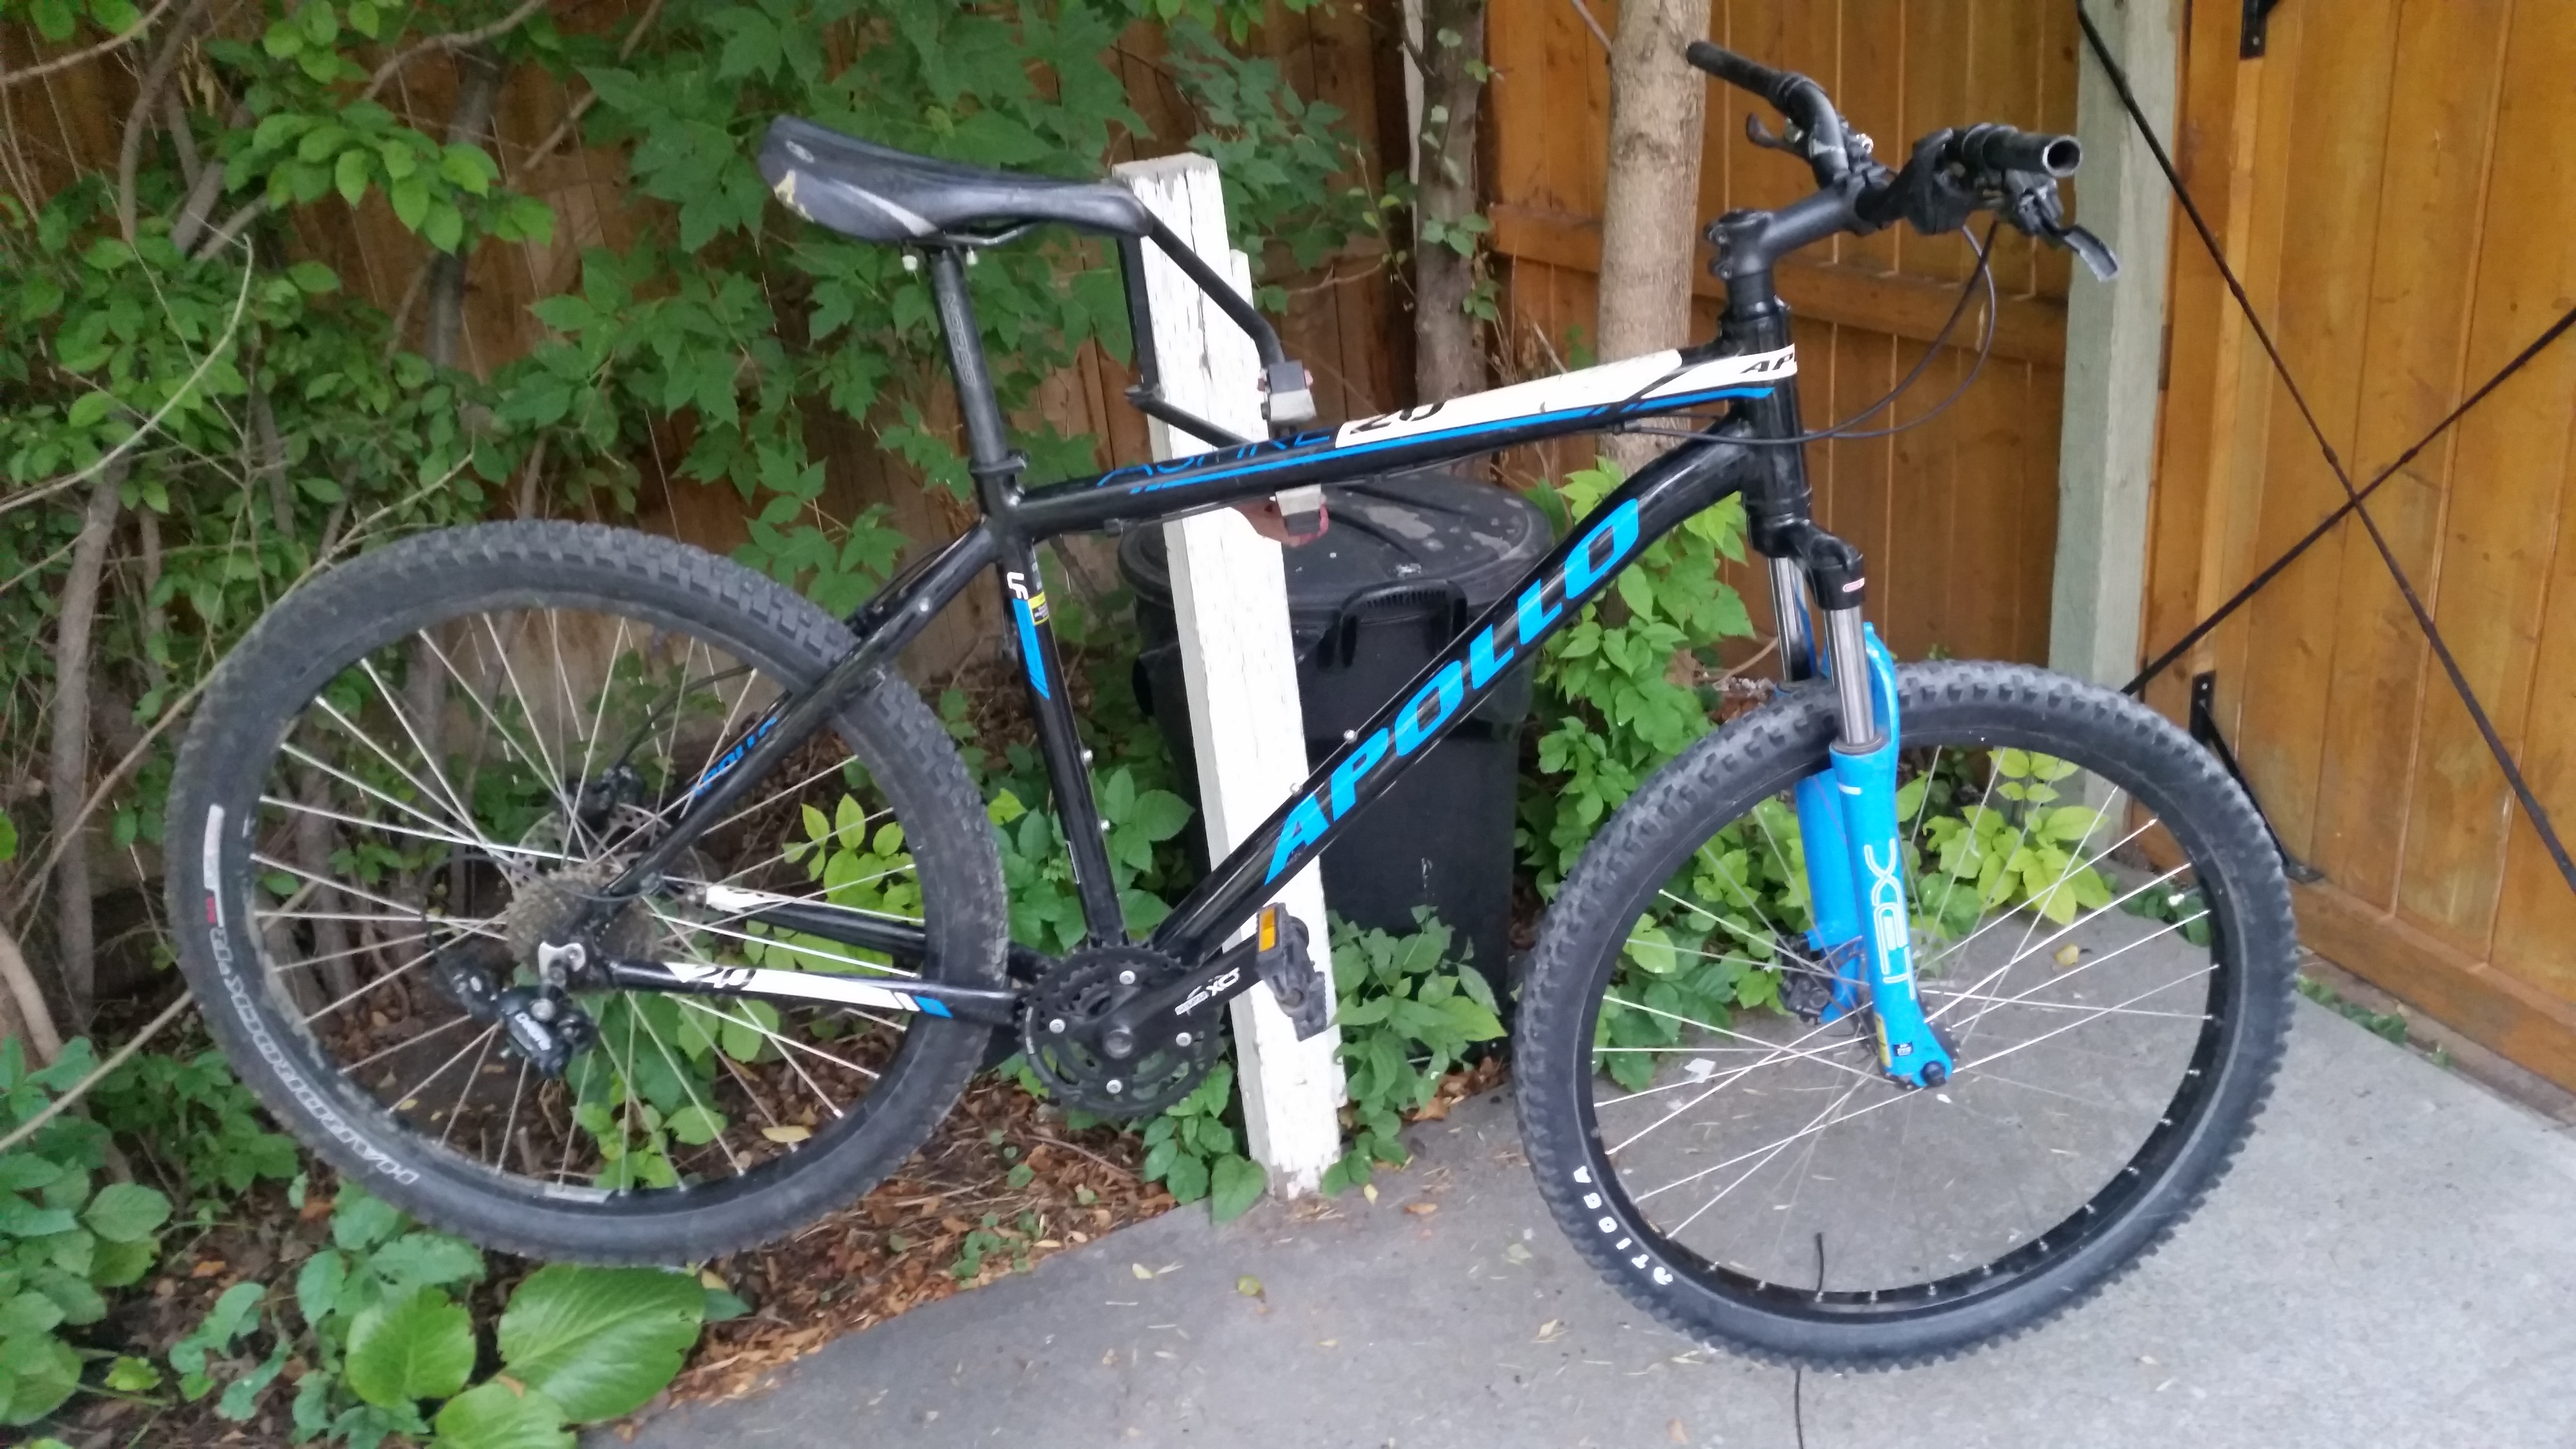
Aside from the brake situation, at this point I was fairly excited. This frame was high quality double butted aluminum. It was from a reputable brand. It looked pretty snazzy. Not my favourite colour scheme, but I told myself that if I liked it enough, I could strip it down and repaint it. It would have to be really fun to ride to warrant that, though.

I assembled the bike and took it for a few test rides, to configure the gears and test the suspension and really dial it in. The brakes were rubbing terribly, but I thought I could adjust that. I had a lot of fun turning the front fork’s suspension on and off with the little lever and dropping off curbs and speeding through back alleys.
That was, until I broke the lever. I just stopped engaging, and my fork was locked in a rigid position. Luckily, a quick google showed me that I could just pry the lever out and re-seat it. I don’t think I’m qualified to overhaul a front fork at this point, so I was quite relieved.

The Brake Situation
Adjusting the brakes was frustrating. My brake rotors were dirty and out of true, and my calipers had very old pads. I spent about half an hour trying to get a “good enough” configuration, and decided to head to my local bike co-op to find a better solution.

I mentioned earlier that I had essentially ruined the hydro brakes when I took the bike apart initially. The front brakes were garbage, and the rear brakes were still very technically functioning, though I had ruined the fluid pressure. The brakes needed to be bled. I had another set of hydro brakes from a different bike as well, and those were also in desperate need of bleeding. The problem is that I’m a cheap bastard and I don’t have a proper stand, so I started looking for a place to bleed these brakes. My local bike co-op doesn’t have bleed kits for public use (understandable, considering how finnicky they are and how easy it is to ruin them if you don’t clean them properly or you use the wrong fluid.)
These hydro brakes also use DOT brake fluid, which proved to be even more annoying as my friend had a bleed kit, but it was only for use with Shimano mineral oil brakes.
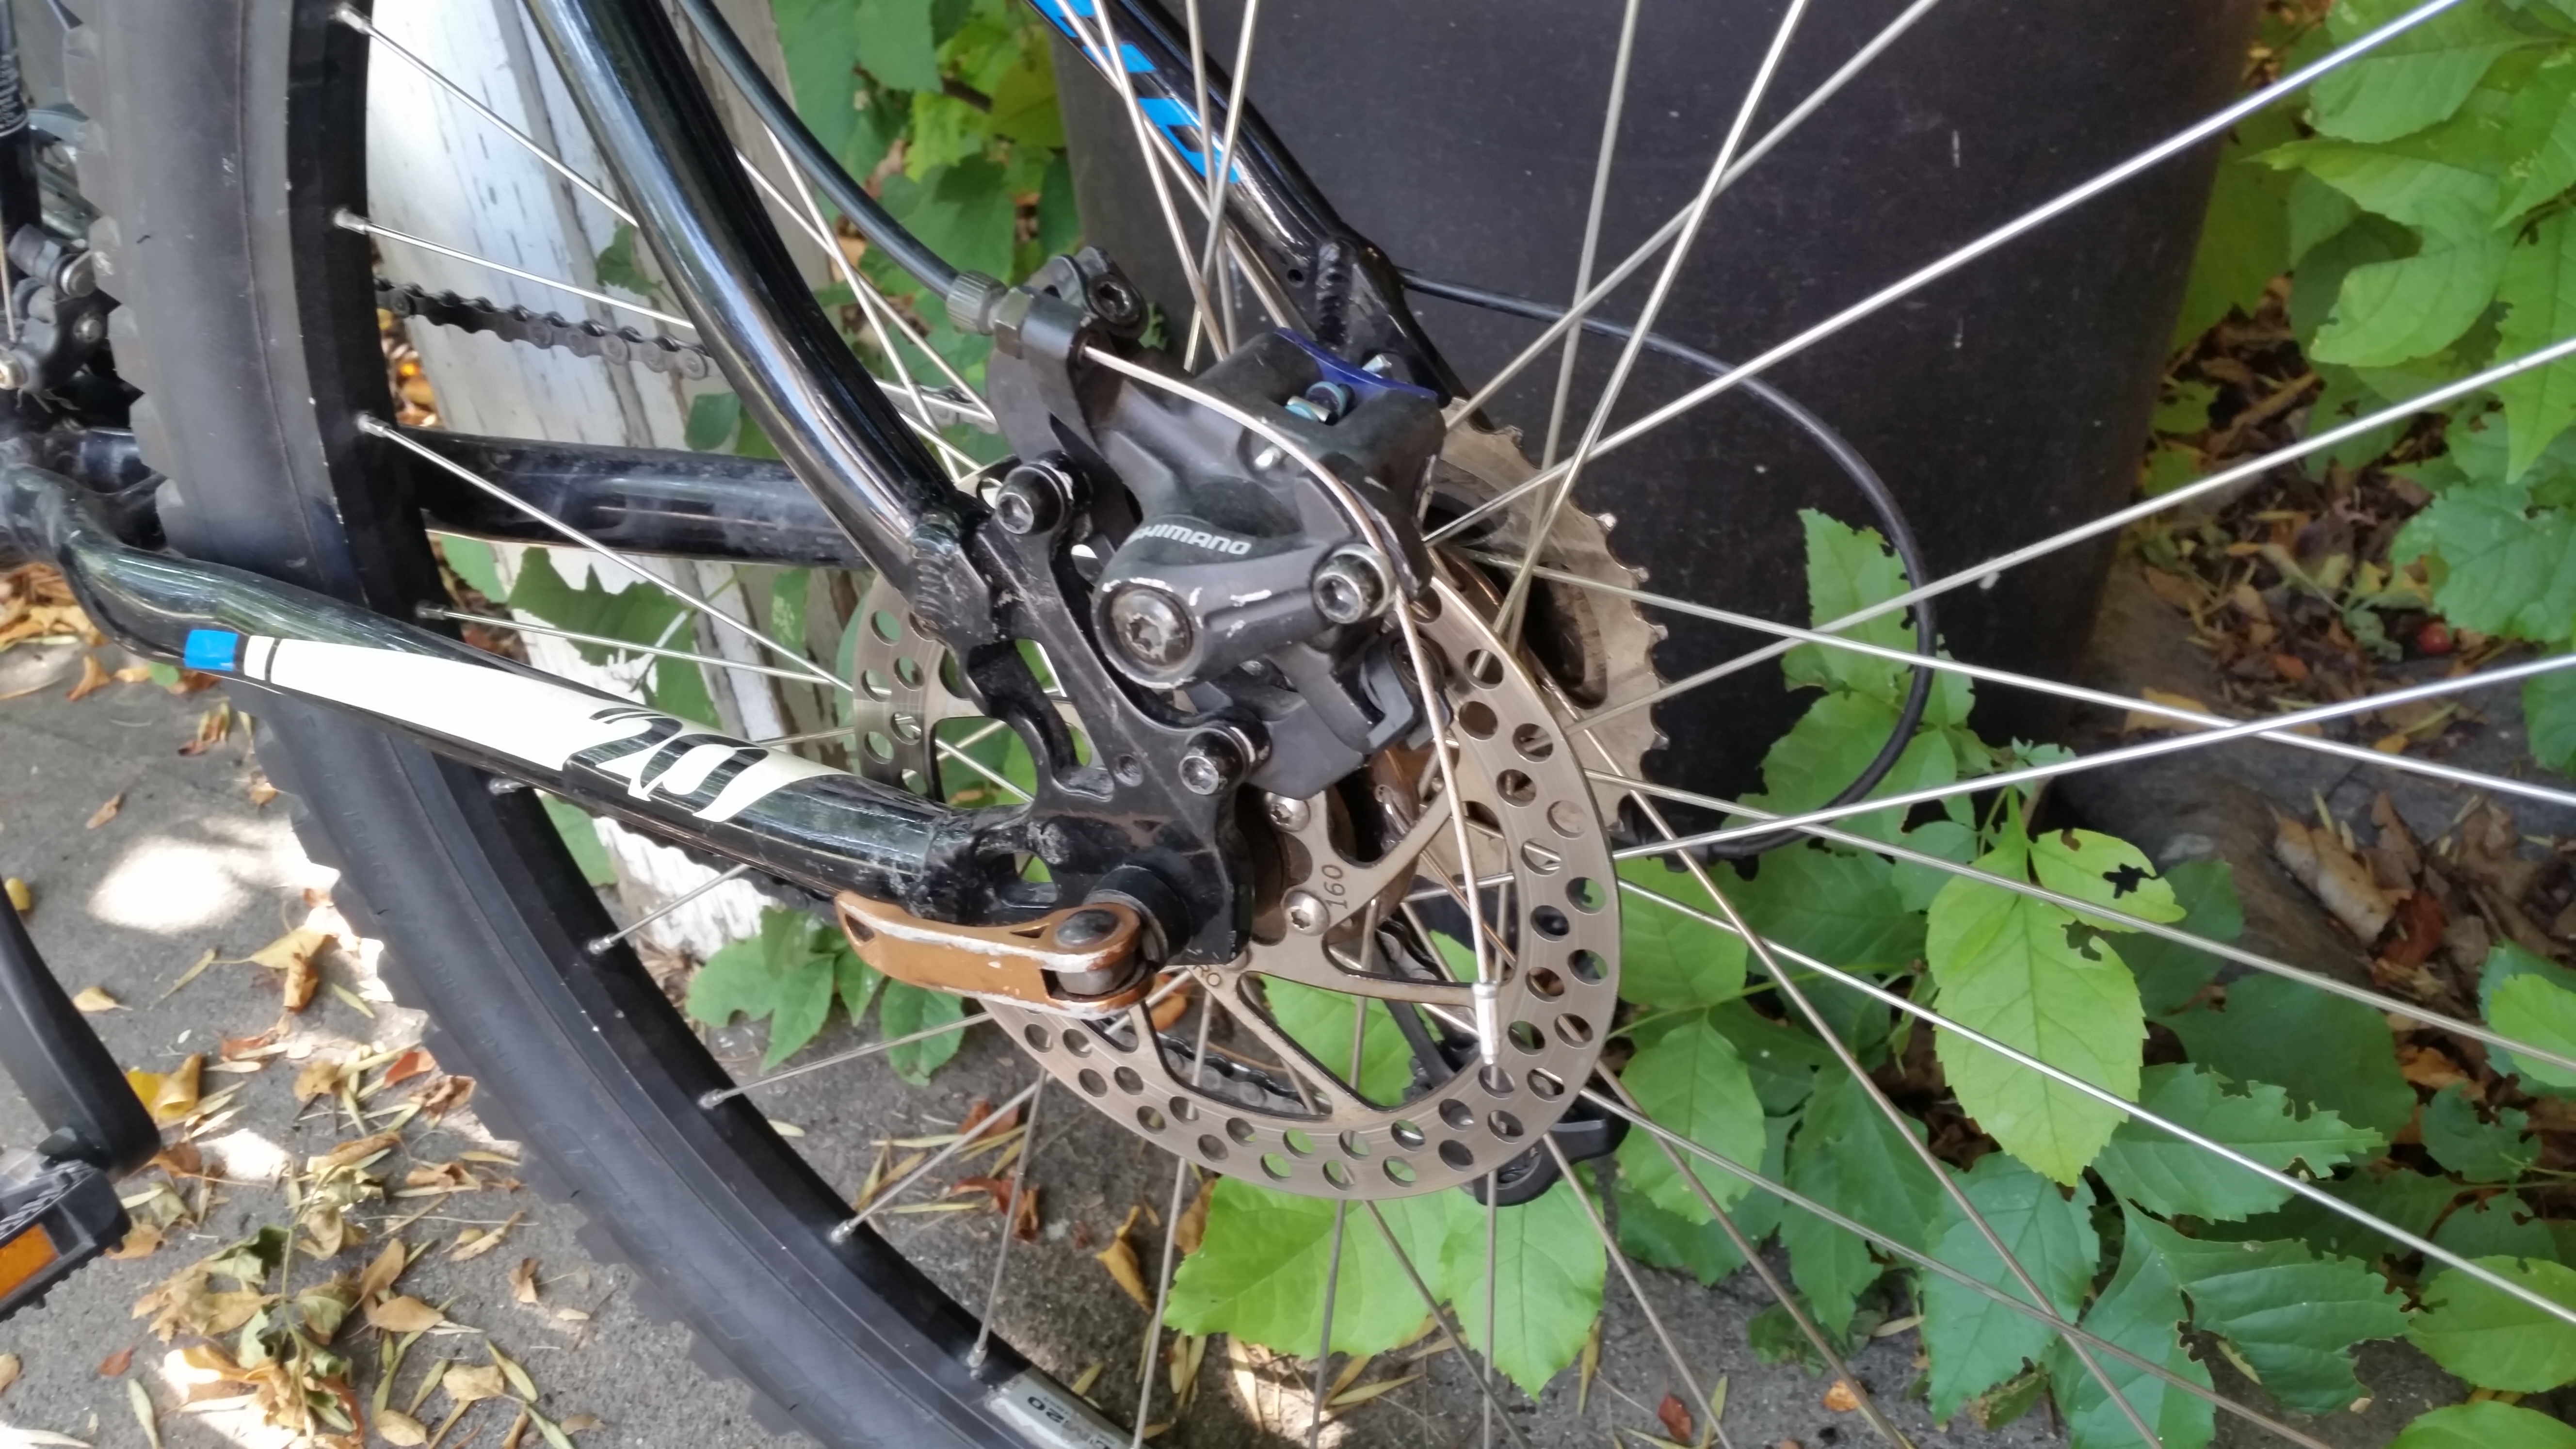
In the end, I gave up. Despite wanting to learn how to bleed brakes and configure them, I realized it wasn’t very practical for me. I went fully mechanical. I like the concept of mechanical more anyways - I like being able to fix your bike on the side of the road with a hex wrench. Someday maybe I’ll toy with fancy hydro brakes. If you wait long enough, the opportunity always presents itself.

I lucked out when I found a single bike that the co-op was getting rid of, which had a single mechanical disc brake on the back. I think it may have been the only mechanical caliper for sale in the whole outfit. I quickly snagged it, cut a new length of housing, and replaced the rear hydro brake with mechanical. Done deal. I also bought new resin pads, and spent a good chunk of time truing up and cleaning the brake rotors with tools belonging to the bike co-op.


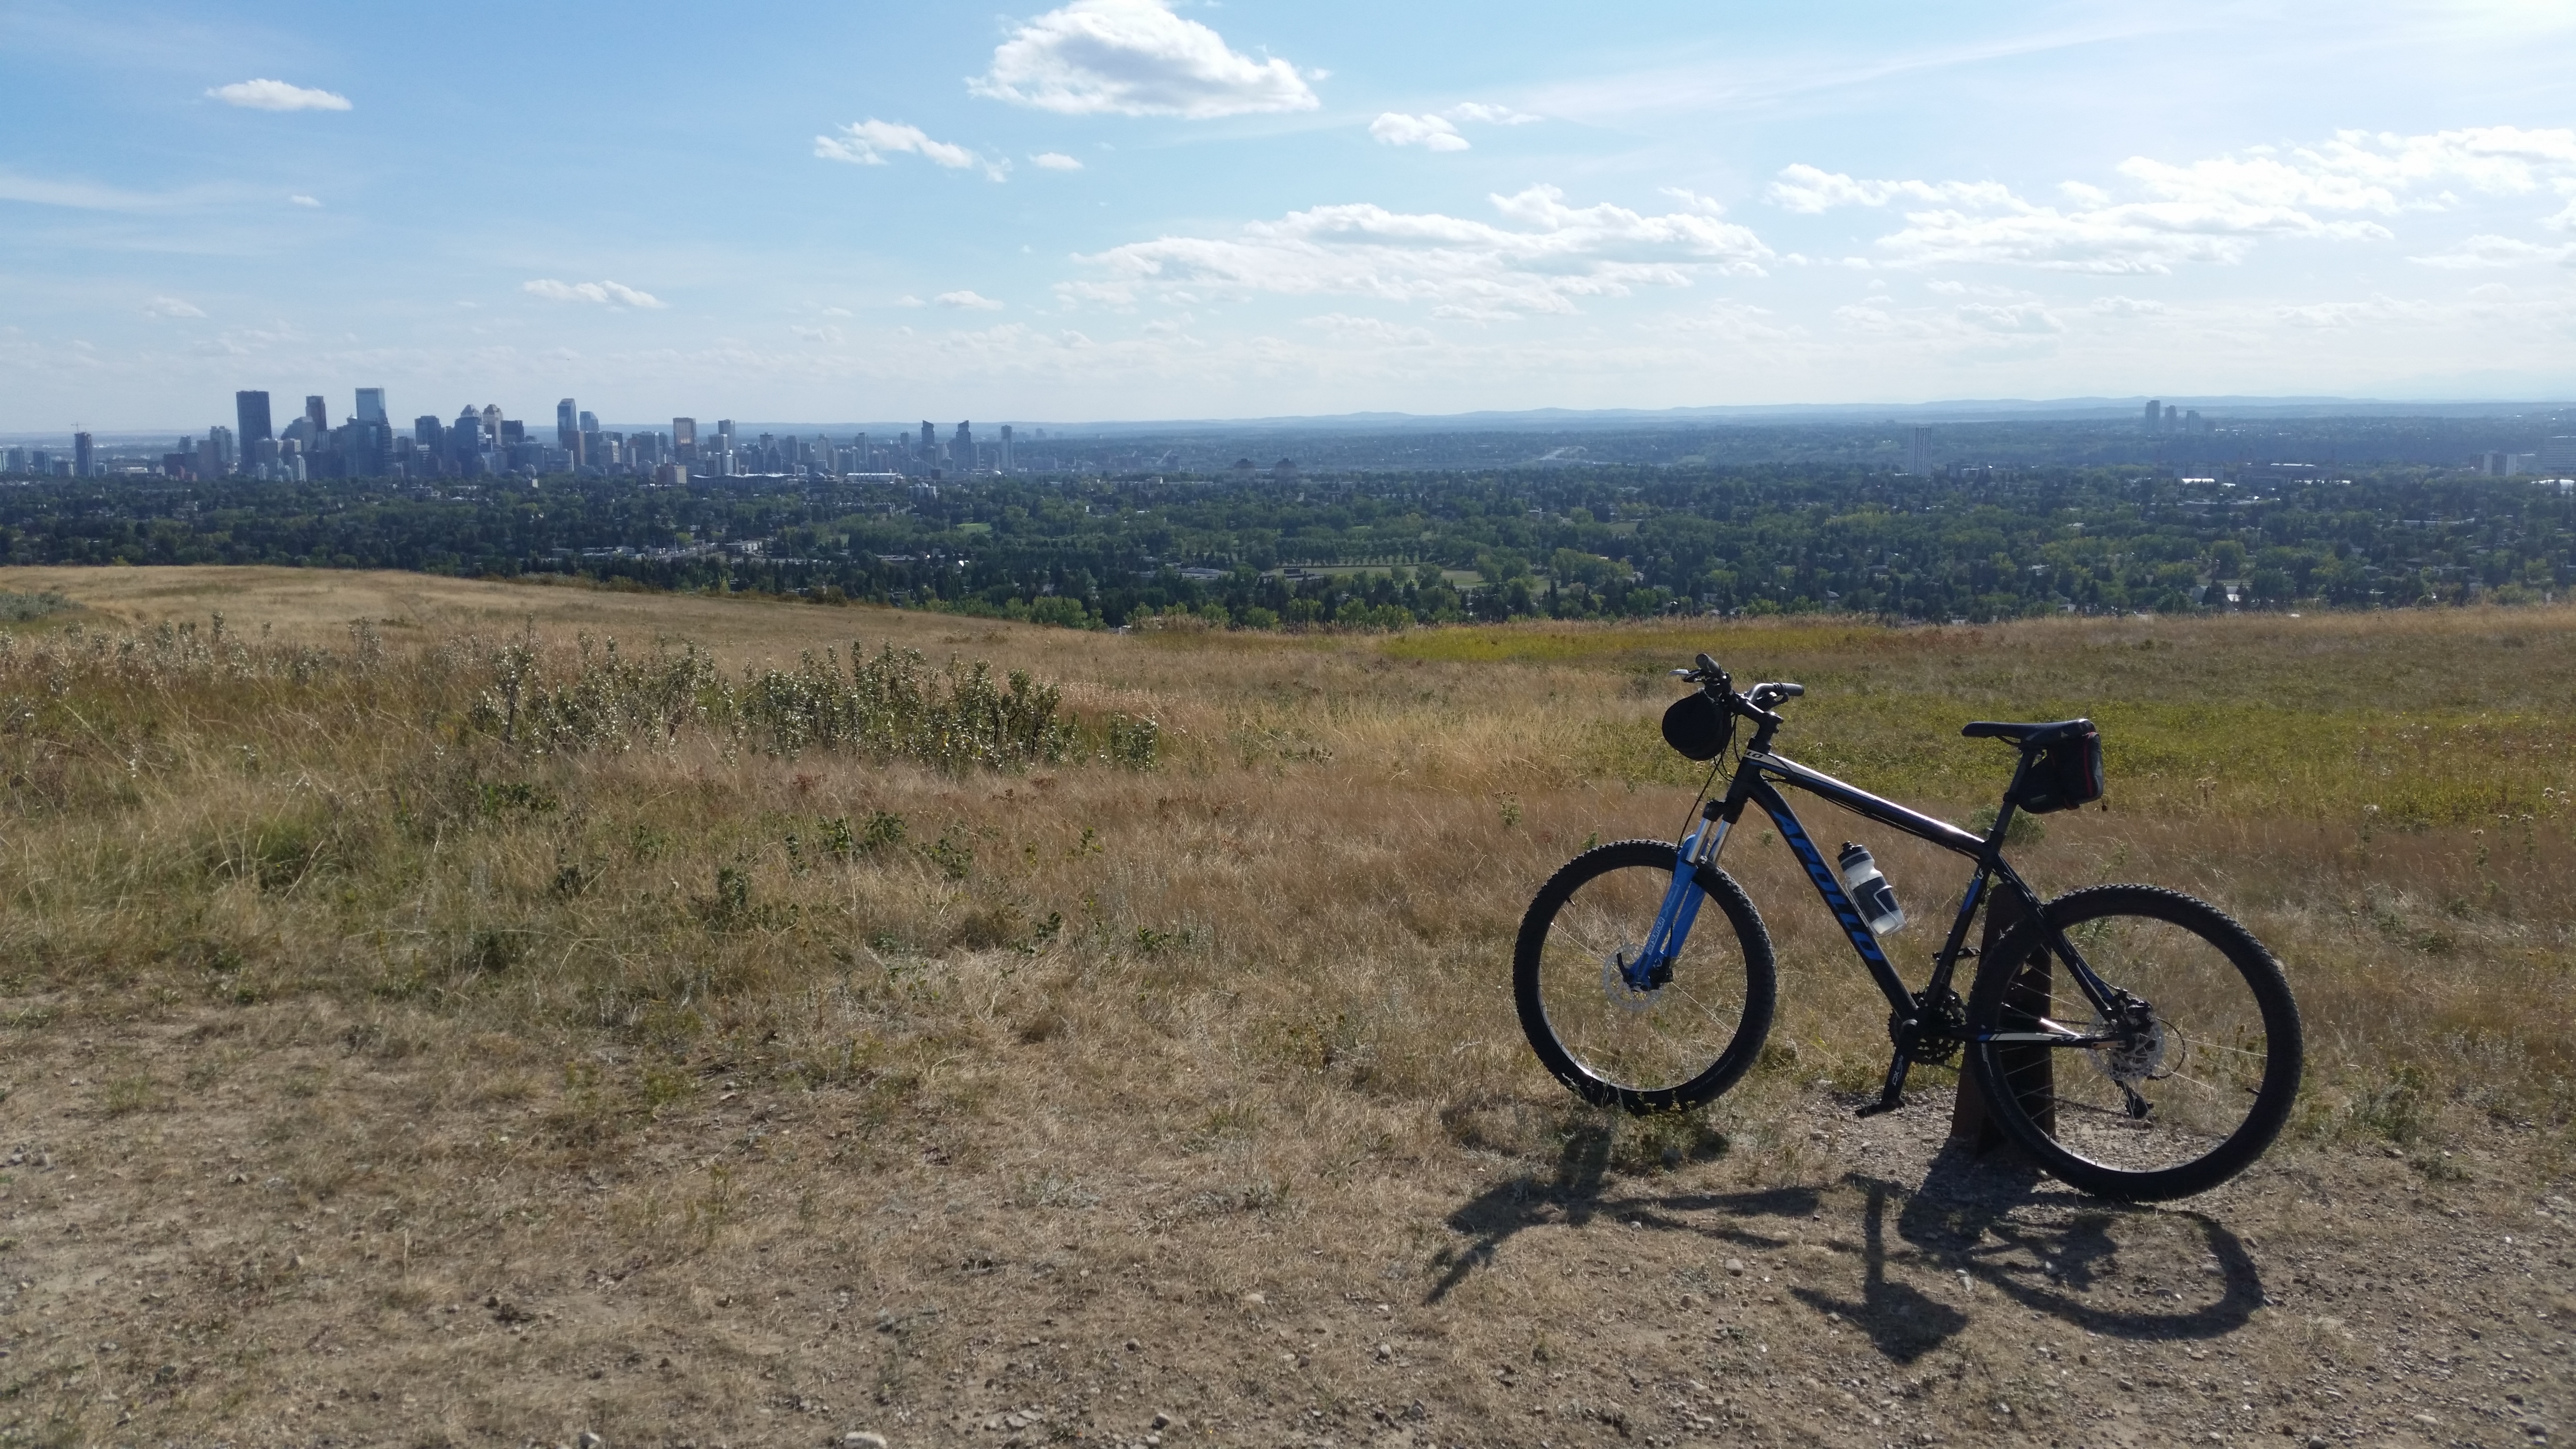
Taking her Offroad
With its fancy drivetrain and disc brakes and wheels taken from a legitimate downhill mountain bike, this is easily the fanciest bike I own. It’s lightweight, it can climb hills like nobody’s business, and the brakes are responsive and strong. It was time to test her out offroad, as I had tested Trug.

(Sidenote - I never realized how lucky I was that I live close to Nose Hill Park in Calgary. It’s mostly untouched land, full of natural grasses, but with ample footpaths and minor trails. And it’s huge! Almost four times the size of central park in New York City)

When you’re used to riding on 28-35mm road tires in the city with no suspension, it’s a strange thing to take a mountain bike offroad. The extra give on the fork makes a HUGE difference, and the squishy fat tires make it feel like you’re riding on a cushion on the flats. I can’t imagine how a full suspension bike must feel.
The tires were inflated to around 65PSI, which is close to the max recommended pressure. For reference, I inflate my fixie’s tires to around 110 PSI (my friend said he could feel the texture of the road in his crotch) and my commuter to around 85PSI.
Getting to the park was a drag, but once I was riding around in the dirt I was having a great time. I could drop gears and zip up hills, or ride down slopes or across gravel without rattling my bones.

I love going through this park, there’s a lot of stops to make a places to stretch your legs and have a snack. I’m not generally someone who bikes for leisure. I enjoy my rides, but most of my riding is within the city, and with a destination or errand in mind. I could learn to enjoy this pace as well.
So that’s it, that’s the Apollo. It doesn’t have a name yet. I haven’t hit the right inspiration. Perhaps it’ll get one when I decide if and how I’m going to paint it. For now, it’s just “My Mountain Bike”.
Now my fleet includes an all-purpose commuter, a lightweight fixie, a piece of shit for winter, and a very competent mountain bike. Theoretically, I can go almost anywhere, at any time of year!
Cost Breakdown
| Item | Cost |
|---|---|
| Disc Brake Caliper | $5 |
| Disc Brake Pads | $24 |
| New Cables | $10 |
| Total | $39 |